READY TO SELL Custom art prints ONLINE?
Get a store built for you in 5 days, plus training and support to help you start, run, and grow your Alternative business.

Learn how to choose an art print niche, protect artwork rights, proof paper and colour, cost each size, write a clear listing and test a small collection.


Custom art prints can turn an artist’s drawings, photographs, paintings or digital work into a shop range that buyers can compare and order from home. The work is more than uploading an image. You need permission to reproduce every design, a print specification that stays consistent, a sample that looks right in person and a price that covers the parcel alongside the paper.
Start with one clear buyer and a small family of prints. Test the artwork at the sizes you plan to sell, choose a production route, photograph the real result and calculate the full cost for each format. A made-to-order range can limit stock risk, but it still needs proofing, reliable dispatch and a plan for damaged or misprinted orders.
This page walks through the decisions from artwork rights to a first month of selling. The examples use UK pounds and UK consumer guidance. Requirements can differ in Northern Ireland, Great Britain and other countries, so check the rules for the market and product you sell into.
Use one art style, a real proof and a full parcel cost to shape a clear first offer.
“Art prints” describes many products. It can mean a small unframed illustration, a numbered screen print, a photograph on archival paper, a framed poster, a canvas reproduction or a personalised map. The cost, buyer, production method and delivery risks change with the offer.
Choose a specific type before you order packaging or create dozens of listings. A shop with a clear visual point of view is easier for a buyer to remember than a catalogue of unrelated images.
Write a sentence that names the buyer, subject and reason for purchase. For example: “I sell botanical linocut prints to people furnishing calm, nature-led rooms, with three sizes that fit common frames.” Another shop could serve new-home gift buyers with custom house portraits, or music fans looking for original gig-poster illustrations.
The sentence should influence what you draw, how you name the products and what details appear in the first photograph. A gift buyer may care about a ready-to-frame size and a gift note. Someone decorating a narrow hallway may need a vertical print with its exact dimensions shown. An office buyer may want a cohesive set in a limited palette.
Speak to people who resemble the intended customer. Ask what room or occasion they are shopping for, what size they normally buy, whether they already own a frame and what makes a print feel worth its price. Show a physical proof if possible. A reaction to a real print is more useful than a compliment about an idea.
Record the words people use. A buyer may ask for a “small wide format for a shelf” rather than a “mini art print”. Those phrases can help shape a product title or image label, provided the listing still describes the product accurately.
Pick a subject you can make into a consistent group. It might be local architecture, garden plants, family pets, food illustrations, abstract colour studies or a series of photographs. The individual works can vary, but a buyer should understand why they belong in the same shop.
Build a small collection around a shared visual idea: a place, season, colour story, technique or subject. A collection of six coastal prints might use the same palette and paper finish. Each print can be bought alone, and a pair or three-piece set gives the buyer a way to complete a wall.
Make a simple collection map before creating more designs. List the working title, subject, orientation, dominant colours, size suitability and any image rights to check. This helps you notice gaps. It can prevent several near-identical images competing for the same customer.
If your range has a hands-on, giftable angle, compare the practical planning in MLFG’s craft kits selling guide. The products differ, but the work of making a set clear and costed is useful when planning print bundles.
An open-edition print can be reproduced again for as long as the design remains available. A limited edition has a stated maximum number and needs a reliable numbering record. A signed print adds a human detail but creates handling time. A personalised print may use a buyer’s name, date, location or supplied photograph.
Do not call a print “limited” if you may reprint the same edition without a clear policy. If an edition is limited, decide whether the count applies to a size, paper type, colourway or the artwork across every size. Explain the count on the listing and keep a record of each number sold.
An original artwork and a print reproduction are different products. State which one the buyer receives. A print from a digital file is still a physical print if you mail it; a download is a digital product. Make the distinction visible in the title, options and first image.
| Format | What the buyer receives | Decisions to settle before listing |
|---|---|---|
| Unframed art print | Printed artwork on a chosen paper or other surface | Paper, finish, image area, border, dimensions and protective packing |
| Framed print | Print mounted in a frame and delivered ready to display | Frame material, glazing, hanging hardware, finished size, weight and breakage plan |
| Numbered edition | A print from a defined edition with an edition number | Maximum run, numbering method, signed or unsigned status and edition record |
| Personalised print | A design changed for an individual buyer | Buyer information required, proof approval, permitted changes and production time |
| Print set | Two or more related prints sold together | Included designs, combined dimensions, set price, packaging and replacement policy |
| Canvas or other surface | Artwork printed on a substrate other than paper | Material, finish, edge treatment, hanging method, dimensions and sample checks |

Start with one collection, a few designs and a small number of sizes. An entry print, a larger statement size and a two-print set can be enough to test whether buyers understand the offer. More variants add photography, proofing, SKU and stock work.
Decide which variants should be separate products and which belong as options on one listing. If a buyer can choose A4 or A3 paper with the same image and finish, one listing with a clear size selector may be easier to manage. If framed and unframed versions have very different shipping, handling and prices, separate listings may make the choice clearer.
Use a code for every saleable version. BOT-03-A4-MAT could identify botanical design three, A4, matte paper. Keep codes short enough to read on a picking label. The product name can be friendly; the SKU should help you pack the correct print.
For sets, name each included design and show the exact combination. “Coastal set” is vague if the customer cannot tell whether it contains two or three prints. List every image, size and finish.
Research the specific subject and buyer, not only the broad phrase “art prints”. Browse marketplace categories, search suggestions, interior design discussions, gift questions and local buying events. Look for the words shoppers use to describe style, room, size and occasion.
This research can show how people frame a need, but it cannot tell you how many prints you will sell. Treat search results and competitor listings as prompts for questions. Do not copy artwork, photographs, product descriptions or distinctive brand presentation.
Review a small sample of listings in the same subject or price range. Note the artwork type, sizes, paper or material details, whether a frame is included, image quality, dispatch estimate, delivery options and buyer questions. Look at reviews for recurring practical issues: a shift in colour, a print arriving bent, frame damage or confusion about the pictured mount.
Use that list to improve your own offer. If several buyers ask whether a frame is included, put “unframed print” near the title and show the unframed product clearly. If customers ask how large it is, show dimensions beside a familiar object or a person holding the actual size.
Do not take another artist’s composition, listing copy or shop images as a template to reproduce. Research should help you understand the buying decision; the artwork, photographs and presentation remain your own.
Create a small set of finished samples or accurate proofs. Photograph them in the sort of setting your buyer might use, then ask a few likely buyers to choose between subject, size and finish options. Ask what they think is included before explaining the answer.
Track actions separately. A save or email sign-up is a different signal from a paid order. Record visits, product-page saves, questions, waitlist registrations, abandoned checkouts and sales. If people like an image but hesitate at the size options, make that choice clearer before increasing the range.
For a made-to-order product, publish an honest sample listing or an interest page with the expected dispatch window. Do not promise an edition or delivery date you cannot meet. If taking a pre-order, state what the buyer is paying for, when the print is expected and what happens if the date changes.
A limited pilot can reveal production and packing problems before a large promotion. Make a small number of orders, time each task and note which questions arrive before and after dispatch. Decide in advance what result would justify a second batch.
Check the artwork rights, ask useful questions and make a small pilot before committing to more designs.
A saleable print begins with a clear right to reproduce the artwork. If you created the image yourself, keep the source file, creation date and records of any collaborators or licences. If another person made it, buying a physical painting or receiving a file does not automatically give you the right to print and sell copies.
The UK Intellectual Property Office says an original artistic work is protected automatically and that copying or distributing copies are restricted uses. Read its current guidance on copyright ownership and using somebody else’s work and who usually owns copyright. This is general information, not a decision about a particular artwork or contract.
If you commission an illustrator, photographer or designer, state in the agreement what you can do with the work. Name the uses you need: product prints, web listings, social promotion, advertising, translations, different sizes, bundles and sales in specific territories. Agree whether the artist can sell the same image elsewhere and whether you can make edits.
The UK IPO notes that the creator usually keeps copyright in commissioned artwork if the parties have not agreed otherwise in writing. A commission may give the buyer an implied or limited licence for the intended use, but that may not cover every later use. A signed agreement can prevent uncertainty about printing, promotion, editions, time limits and attribution.
If you purchase a stock image or use a licensed design, read the actual licence. Check whether physical products for sale are permitted, the allowed print quantity, the territory, whether the work may be altered, and whether credit is required. A licence for website decoration is not automatically a licence for product reproduction.
Keep a rights folder for each design. Store the original file, agreement, licence receipt, permitted uses, collaborator names and any expiry date. If the licence ends or a partner leaves, you can see which products and listings need review.
A customer who uploads a photograph may not own the rights to it. Set rules for what can be accepted. Ask the buyer to confirm that they have permission to supply the image and that they are authorised to request the intended use. Do not print a celebrity, character, logo, sports badge or another artist’s work simply after a customer sends the file.
Tell buyers how their upload will be used, who will handle it, how long it is kept and how they can request its removal. Avoid collecting more personal information than the order needs. Keep access limited to people who prepare and print that job.
Define the personalisation process before taking payment. State which details the buyer must provide, the proof approval deadline, how many revisions are included, and what happens if they do not reply. A portrait or map may need a longer approval stage than a standard print.
Do not create avoidable disputes with vague wording such as “custom work is non-refundable”. Consumer cancellation rights and remedies for faulty or misdescribed items are not the same. Explain the item accurately, follow the rules for the country where you sell, and ask a qualified adviser if an edge case could affect your shop.
An image can include more than the artwork you drew. It might show a recognisable character, logo, photograph, building, product or map layer. Some uses can involve copyright, trademarks, privacy, design rights or contract terms.
If a design is inspired by a real place, use your own photograph or a source with a suitable licence. A public location does not mean every photograph taken there is free to reproduce. Check the image rights, and do not imply that a brand, venue or person endorses your print.
If a generative design tool contributes to an image, check the terms of the tool, the source material, the marketplace rules and any local consumer disclosure requirements. A platform can set its own rules. Etsy, for example, allows seller-prompted AI artwork under its Creativity Standards but requires the listing to disclose AI use; read the current Etsy Creativity Standards and production-partner rules before listing there.
There are three common production routes: make prints yourself, use a local or trade printer, or ask a print-on-demand partner to produce each order. A mixed model can work, such as holding small stock of bestsellers and using a partner for larger sizes.
| Production route | Strengths | Checks and trade-offs |
|---|---|---|
| In-house printing | Direct control over proofing, timing and small batches | Printer, inks, maintenance, paper stock, colour management, time and replacement cost |
| Local or trade print studio | Professional equipment without buying the full setup | Sample quality, minimum quantity, lead time, file requirements, reprint terms and freight |
| Print-on-demand partner | Production starts after an order, which can reduce finished stock | Unit cost, colour consistency, packing, tracking, dispatch origin, return process and partner disclosure |
| Hybrid production | Stocked core sizes plus made-to-order special sizes | More than one specification and delivery promise to keep in sync |
Send the same short brief to potential suppliers so that quotes are comparable. Include image dimensions, finished size, paper or surface, finish, border, quantity, packaging, delivery postcode and required date. Ask whether the price includes trimming, proofing, taxes and delivery.
Ask how the printer handles colour profiles and what file format, resolution and bleed are needed. Ask whether the first proof can be checked before the full run. Confirm how a damaged print, miscut edge or colour problem is assessed and whether a reprint is available.
For a production partner, ask where the order is made and dispatched from, what branding appears on the parcel, whether packing slips can be customised, what tracking is provided and how a reprint request works. Ask what happens if a design file changes after older orders are placed.
On a marketplace, check whether a production partner must be disclosed. Etsy requires partner disclosure for items made from a seller’s original design by a third party, and sellers must describe where a product is made and shipped from. Its partner guidance explains the current requirements.
Keep a high-quality master file separate from platform previews. Make a working copy for each print size and supplier specification. Do not stretch a small image to a much larger size without checking the print result at its intended viewing distance.
Ask the printer what resolution they recommend for that process and size. Check the final crop, margins and orientation. Confirm whether the image is intended to bleed to the edge or sit within a white border. A file can look correct on a laptop and still crop a signature, detail or important subject when printed.
Create a version record with the filename, dimensions, colour profile, date, supplier and approved proof. If you revise an image, mark the updated file as a new version and retire the old one from listings and print folders.
A print sample is a product test, not just a preview. Order or produce the exact size, paper and finish you plan to list. Inspect it in normal room light and daylight. Compare the print with the digital reference, bearing in mind that screens and reflected ink do not display colour in the same way.
Check the paper feel, surface, contrast, fine lines, large flat colour areas and edge quality. Look for banding, dust marks, scratches, uneven margins, clipping and inconsistent trimming. If you sell a signed edition, test the pen or pencil on the selected paper and check that the mark dries without smudging.
Place the sample in a frame of the stated size if the listing refers to a common frame. Check whether the image sits inside the mount, whether the visible print area changes and whether a border looks balanced. Photograph the product as it will be sold, rather than using a digitally enlarged mock-up alone.
A design that works as a small print may feel crowded at a large size or lose a fine detail when reduced. A matte paper, gloss paper, canvas or aluminium panel can produce different colour and texture. Test each combination you intend to sell.
If you offer A4 and A3, print or proof both. Confirm the image crop, orientation and border in each file. A buyer who selects A3 should receive the artwork at the stated size, not a scaled version with an unexpected white margin.
Keep an approved physical reference where you can compare future batches. Store it away from sunlight, dust and moisture. Write down the supplier, material and settings used for the approved result.
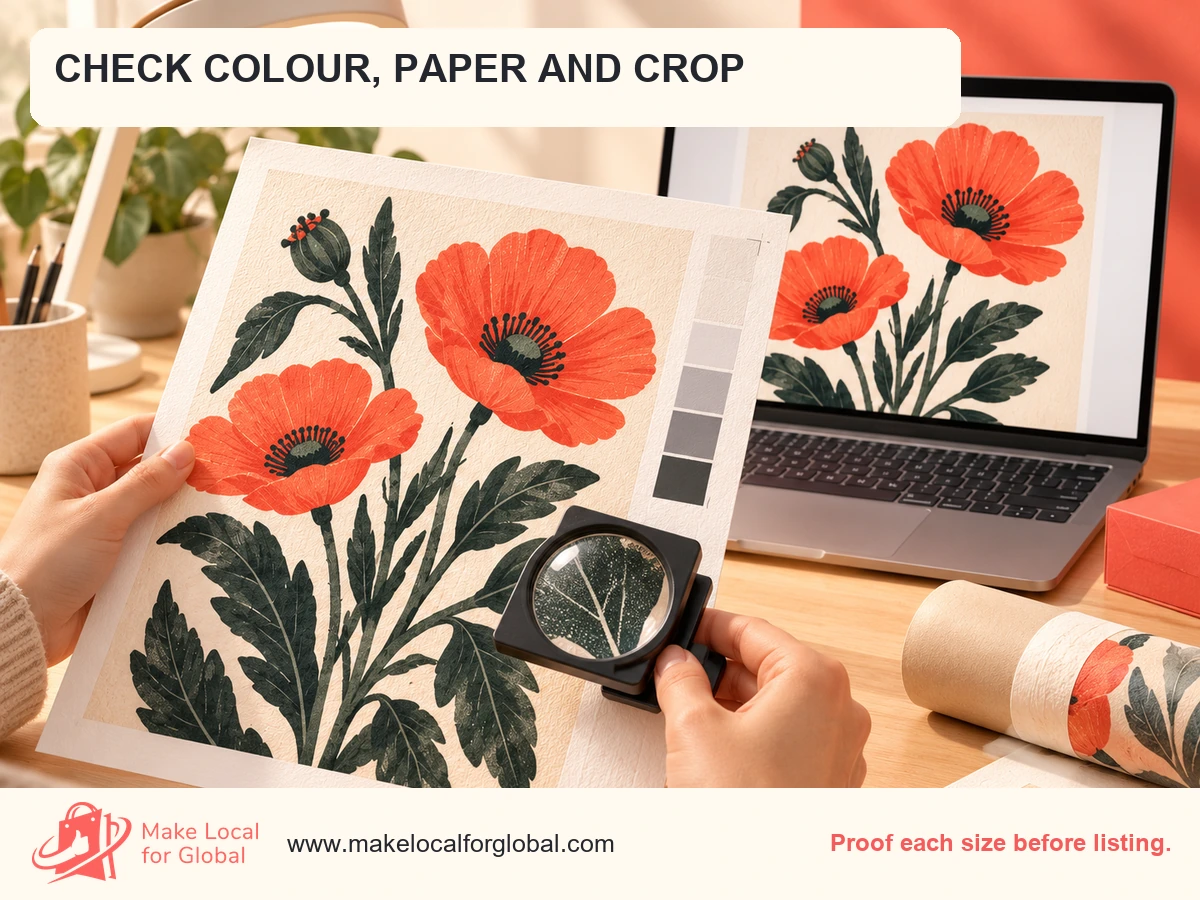
Use a short check sheet for each batch or incoming order:
A predictable routine makes quality easier to maintain when you add designs or ask someone else to pack orders. If you find a recurring flaw, pause the affected listing or batch and resolve the source before sending more prints.
The product page needs to answer practical questions before a buyer commits. Start with the image, subject and product type. Then state the print size, material, finish, frame status, edition details and dispatch estimate.
Use the terms a buyer might search, followed by a clear subject or style. A title such as “Botanical Art Print, Coral Poppy Linocut, A4 or A3 Unframed Wall Art” describes the product, subject, style and options. Do not add material or edition claims that you cannot support.
Give different designs their own meaningful names. “Poppy Study No. 03” is easier to reference in a message than “Print 27”. Keep the names consistent on the listing, invoice, packing slip and inventory record.
Include the finished dimensions in centimetres or millimetres and, where relevant, inches. State whether the listed size describes the paper or the image area. If a border is present, say how wide it is or show a diagram.
Name the paper or surface, finish and printing method when you can verify them. Avoid terms such as “archival”, “museum quality”, “fade-proof” or “sustainable” only when material and supplier records support the claim.
Tell the buyer whether a frame, mount, hanging hardware or digital file is included. If the print is unframed, say it near the top and repeat it in an image or size graphic. Do not make the buyer infer it from a small note.
For signed or numbered prints, state whether the print is signed on the front, back or certificate, the edition limit and the numbering format. If you sell the same image in different sizes, say how the edition count works across those sizes.
For a personalised piece, list what the buyer must send, how to send it, whether you provide a proof, the revision limit, the production window and the exact output. Explain how a buyer can correct a typo before the print is made.
Use a clean image of the real print as the first listing image. Add a room scene only if the print remains accurate and easy to inspect. Show a close-up of paper texture or an edge, a size comparison and the full artwork without glare.
If you use a frame in a lifestyle photo but do not sell the frame, make that clear on the image or listing. Keep the print colours close to the physical sample. Do not use a mock-up that crops a title, border, signature or detail that the buyer will receive.
Photograph the print flat in even light, with the camera parallel to the paper. Avoid glare from glazing or strong filters that shift the colours. Use a neutral white balance and include one photograph with a familiar size reference.
Use a detail photograph for fine line work, texture or hand embellishment. It should show the actual surface, not an artificial sharpening effect. For a print set, photograph all included designs together and show the number of prints clearly.
Open with one short paragraph that tells the buyer what the print is and where the design idea comes from. Then use scannable details:
Answer the questions people asked during your buyer test. If one buyer asked whether a print would fit a standard A4 frame, state the paper size and whether the border affects the visible artwork. If someone asked whether you ship a frame internationally, list the locations you actually serve.
Pricing a print by multiplying the printer’s cost is likely to leave out the work between production and delivery. Add paper or supplier cost, inbound freight, packaging, labour, platform or payment fees, delivery, reprints and the cost of acquiring the order.
Start with the customer-facing price and add each variable cost per order. Check what remains after those costs. That remainder is contribution available for fixed costs and owner pay; it is not net profit.
The following figures are illustrative. Replace them with supplier quotes, actual postage, your own handling time and the charges from your chosen sales channel. The example assumes the seller is not VAT-registered, so VAT is not separately charged or shown; £34 is the full print price to the buyer and the £4.50 delivery charge is passed through to the carrier.
| Item for one order | Illustrative amount |
|---|---|
| Customer price for the print | £34.00 |
| Delivery charged to the buyer | £4.50 |
| Total money received | £38.50 |
| Print production | £8.50 |
| Inbound freight allocated per print | £0.50 |
| Sleeve and backing board | £1.10 |
| Rigid mailer and seal | £1.45 |
| Packing labour, 4 minutes at £10.50 per hour | £0.70 |
| Carrier delivery | £4.50 |
| Channel and payment allowance | £2.40 |
| Reprint, damage and returns allowance | £0.90 |
| Customer acquisition allowance | £1.50 |
| Total variable cost | £21.55 |
| Contribution before fixed costs and tax | £16.95 |
The arithmetic is £38.50 received minus £21.55 in variable costs. The £16.95 is not net profit. It still has to contribute to fixed software, equipment, insurance, studio time, accounting, taxes and any unpaid owner work.
The £2.40 channel allowance is a planning estimate, not a published platform fee. Etsy, for example, lists separate charges for listings, transactions, payment processing, advertising and other services, and some charges apply to postage too. Check the current Etsy fees for your location before setting a marketplace price.
If the seller becomes VAT-registered, prices, input tax treatment and the cost model need a fresh calculation. HMRC currently says UK businesses must register when taxable turnover passes £90,000 in a rolling 12-month period or when they expect to exceed that amount in the next 30 days; read the current HMRC VAT registration guidance and obtain tax advice for your situation.
An A3 print might use more paper and a larger mailer than an A4 version, yet the workload does not simply double. A framed size can change weight, box size, breakage exposure, dispatch time and delivery cost. Build a separate cost line for each product variation.
| Sale format | Print or production cost | Packaging and delivery | Fees and allowances | What to compare |
|---|---|---|---|---|
| Small unframed print | Supplier quote for the small size | Flat mailer and tracked or standard service | Channel fee, replacement allowance and promotion | Whether the margin supports your handling time |
| Large unframed print | Quote for the larger size | Stiffer, larger mailer or tested tube | Recalculate the platform fee on the order total | Whether the price increase covers the format change |
| Framed print | Frame, glazing, mount and assembly | Protective corners, outer box and heavier delivery | Damage reserve and any higher fulfilment cost | Whether ready-to-hang value covers added risk |
| Two-print set | Two production costs less any batch saving | One mailer only if both fit safely | Fees on the set price and delivery | Whether the set improves contribution per parcel |
If a customer pays postage, count both the postage charge received and the amount you pay. If delivery is free, include the carrier cost in the product price. Do not hide a large delivery cost in the print figure and then compare it with an item-only competitor price.
Write the smallest amount you can accept before you list the product. To find it, sum the production, packaging, labour, fees, delivery, returns and acquisition cost. Add the contribution you need to pay fixed costs and yourself.
Decide the lowest discount you can offer without selling below that amount. A 15% promotional discount affects the price received, but it does not reduce the printer’s bill or carrier rate. Check the contribution again for a set or sale price before using it in an advert.
Review the figures after real orders. Replace assumed minutes with measured packing time. Update the fee allowance from your payment statement. Count misprints and returns against the relevant SKU rather than treating them as a surprise business expense.
A good print can arrive bent or scuffed if the packaging is chosen only by price. Test the full parcel with the product inside. Check that the paper cannot move freely, the corners are protected and the outside cannot flex easily in normal handling.
For a flat mailer, place the print in a clean protective sleeve or suitable interleaving, add a rigid board and use a mailer that does not bend under light pressure. The board should extend close to the edges of the print. Seal the contents so the corners cannot slide out.
A mailing tube can suit larger rolled prints, but rolling changes the product experience and may not suit every paper or image. Ask the print supplier whether the material can be rolled safely and test the print after it has been unpacked and flattened. Explain if the customer needs time or weights to let the print settle.
Frames need corner protection, separation from glazing and an outer carton that holds the item still. Test the actual frame, size, carrier service and destination. A small frame may travel well in one package; a large glazed frame may need a different service or may be unsuitable for some routes.

Photograph a packed sample before launch. Record the packed dimensions and weight for each SKU. These numbers influence carrier quotes, postage labels and delivery promises. Keep a packing checklist with the product code, protective layers and any signed certificate or care card.
Use the same parcel specification for each saleable version until you test a change. If you replace a mailer, board or sleeve, check whether the print still arrives flat and whether the new pack fits your carrier limits.
Online buyers need a realistic dispatch estimate and delivery method before they place an order. A print made after purchase needs more time than a print already on the shelf. State production days separately from transit estimates where that distinction helps the buyer.
UK distance-selling guidance says sellers need to provide key information before an order, including the trader’s details, a description, the price and taxes, delivery arrangements and cancellation information. See the current GOV.UK guidance for online and distance selling.
For many online orders, customers can notify the seller within 14 days of receiving the goods that they want to cancel, with another 14 days to send them back. The rules include exceptions, including certain items made to the customer’s specifications or clearly personalised. The details depend on the item and order, so do not assume every made-to-order print is exempt. Review GOV.UK returns and refunds guidance and get advice if your personalisation model is unclear.
Cancellation rights do not remove a seller’s responsibilities if a product is faulty or does not match its description. State your contact route for damaged, missing or incorrect prints. Ask for a photo when it helps identify a production issue, but do not make a photograph a barrier to a remedy the buyer is entitled to.
Keep the product page and parcel consistent. A sample photograph, paper description, border and frame status form part of the buyer’s expectation. Under the UK Consumer Rights Act, goods must meet the description and be of satisfactory quality; use the official legislation text as a starting point for the statutory wording.
A marketplace can put your work beside people already browsing for prints, but it brings rules, fees and competition. Your own store gives you more control of the collection and customer experience, but you need to bring visitors to it. An in-person market lets buyers see paper and colour, though it adds event, display and travel costs.
Choose one main channel for the first test. Learn how its listing, checkout, postage and payment process work. Add a second channel after you can keep images, stock, prices and dispatch information in sync.
Before listing, read the marketplace’s rules on original designs, images, production partners, custom work and seller disclosures. Etsy permits original seller designs printed by a production partner under its current policy, with partner disclosure and accurate dispatch information. This is a platform rule, not a legal rule for every shop.
Etsy’s fee page lists multiple fee types and notes that charges can apply to postage, listing renewals, payment processing, advertising and taxes. Fees can change and vary by bank country or seller situation. Add the current fees into your cost sheet rather than copying an old blog figure.
Marketplace photos must show the product fairly. Use a photograph or mock-up that is permitted by the platform and represents your real artwork and material. Avoid listing popular characters or brand logos only if you have rights to reproduce them.
If you sell through your own website, show who operates the shop, how to reach you, what each print includes, delivery costs, cancellation and returns information, and how customer uploads are handled. The online-sales rules require key information to be available before an order. Make it readable on a phone.
Group prints into collections with useful labels. Add related items such as pairs or sets only when the buyer can understand what is included. A collection page should help the customer compare style and size, not repeat the same vague sales phrase.
The same range-planning question appears in other categories. MLFG’s candle holder selling guide shows another way to explain style and product choices to a buyer.
Offer payment and checkout methods your store can actually support. Test the full order as a buyer, including confirmation email, taxes, delivery options and mobile layout. Do not advertise a dispatch time that your printer cannot meet.
A local art fair, maker market or open studio can show which images attract attention and which sizes people pick up. Buyers can see paper texture and scale directly. Count that learning alongside sales.
Bring a small display range and a clear price list. Label the prints that are unframed and show frame examples without suggesting the frames are included. Use a QR code to collect consent-based email sign-ups or direct people to the matching collection page.
Track which designs receive questions and whether shoppers choose a single print or a set. Ask permission before adding a person to a mailing list. Use that information to plan the next print run rather than producing a broad range from one busy event.
For a different example of precise product-page information, see MLFG’s guide to selling bed frames online. Clear dimensions and included parts matter for prints too, especially when buyers must choose a frame separately.
Search optimisation starts with specific, useful product pages. Give each print a distinct name and description. Use the words buyers use for subject, style, room, occasion and material where they apply. A listing for a “coral poppy linocut art print” should not be a near-copy of a listing for a coastal photograph.
Write an original page for each design. A template can keep the order of specifications consistent, but the opening copy should explain what makes that artwork different. Avoid repeating a keyword in every heading or adding a list of unrelated tags.
Create collection pages only when they help a buyer compare a meaningful group, such as botanical prints, coastal studies or small gift prints. Give each page a short introduction, clear product links and helpful details about sizes or sets.
If several options share most content, keep them together as a single product with clear variant selectors. Duplicate pages with only a size changed can confuse buyers and dilute your own site structure. Separate products where their use, production or delivery are genuinely different.
Use image filenames and alt text that describe the artwork. A concise alt description might say “Coral poppy linocut art print on warm white paper”. Do not stuff the description with sales terms. If the image is decorative beside the same visible artwork title, follow the site’s accessibility approach for decorative images.
Useful content can show how to choose print sizes, pair colours, frame an unframed print or care for a paper artwork. Use real examples from your own collection. A size diagram or photo of the print next to a frame can resolve a question before checkout.
Offer gift guidance only if your fulfilment process supports it. State whether a gift message, no-price packing slip or gift-ready wrap is available. Photograph the actual packaging and add its cost and labour to the price.
Create behind-the-scenes content that adds information. A short clip of a proof being checked, a paper sample comparison or an edition being signed can help buyers understand your process. Keep the print and colour truthful; use lighting that shows the actual surface.
Send people to a relevant collection rather than a generic home page. Use one campaign link per channel and track the visits and sales that follow. Do not treat followers or likes alone as a measure of demand.
Every order should connect to the design file, print specification, supplier and parcel method. Keep an order log with the SKU, size, paper, edition number if relevant, print date, inspection outcome and tracking reference.
Set a daily or weekly production rhythm that matches your order volume. If the printer batches jobs once a week, state a dispatch window that allows for that schedule. When a supplier changes a material or delivery estimate, update the listing and customer promise.
For a personalised job, use a separate approval stage. Check spelling, crop, date, orientation and image rights before production. Record the buyer’s approval and the final file version. Do not rely on memory or an informal message buried among other conversations.
Write a short response plan for common questions:
Use the reports to fix the product, not only to close the support conversation. A recurring colour complaint may point to a proofing or screen-photo problem. Repeated bent corners may require a stronger mailer or a different carrier format.
For open editions, track blank stock, ready-to-ship prints, packaging and supplier lead time. Reorder from actual sales and expected production time rather than a guess. Keep designs with similar names in separate labelled sleeves.
For numbered editions, record each number, size, date, buyer order and any print that was damaged or discarded. Decide whether a replacement keeps the original number or receives a new one, then explain the policy before listing. Never sell a number twice by mistake.
Keep a record of files in print circulation. Mark archived designs as unavailable and remove stale links from product pages. If a rights agreement expires, identify affected designs and stop new orders until you have permission to continue.
Store paper and finished prints flat, dry and away from direct sunlight. Keep packaging clean. Set a reorder threshold for the mailers or backing boards so a popular design does not become temporarily unsendable.
A large first catalogue multiplies proofing, photography, listing and stock work. Buyers may find it harder to understand the shop. Start with one collection and add designs when a real question or sale pattern supports the next one.
A monitor can hide paper texture, colour shifts and cropping. Print the actual size and material before selling it. Keep an approved sample for comparison.
Buying an original or downloading a file does not normally grant commercial print rights. Ask for written permission that covers the uses you need and save the licence with the artwork record.
A print made after an order may still be a standard product from a regular size range. Do not promise that cancellation rights do not apply until you have checked the exact rules for the product and buyer location.
A styled frame can help explain scale, but it can create a false expectation. State the frame status on the first image or near the title and show the unframed print plainly.
The printer’s charge is one part of the order. Add packing time, protection, fees, delivery, replacements and customer acquisition. Recalculate if the buyer selects a larger size or frame.
Screens and print surfaces differ. Describe the product and photograph the sample carefully. Avoid absolute colour-match claims that you cannot guarantee across devices and lighting.
A partner can print and ship the item, but your listing still needs the correct dispatch location, processing window and required disclosure. Confirm who handles damaged or misprinted orders before you send buyers there.
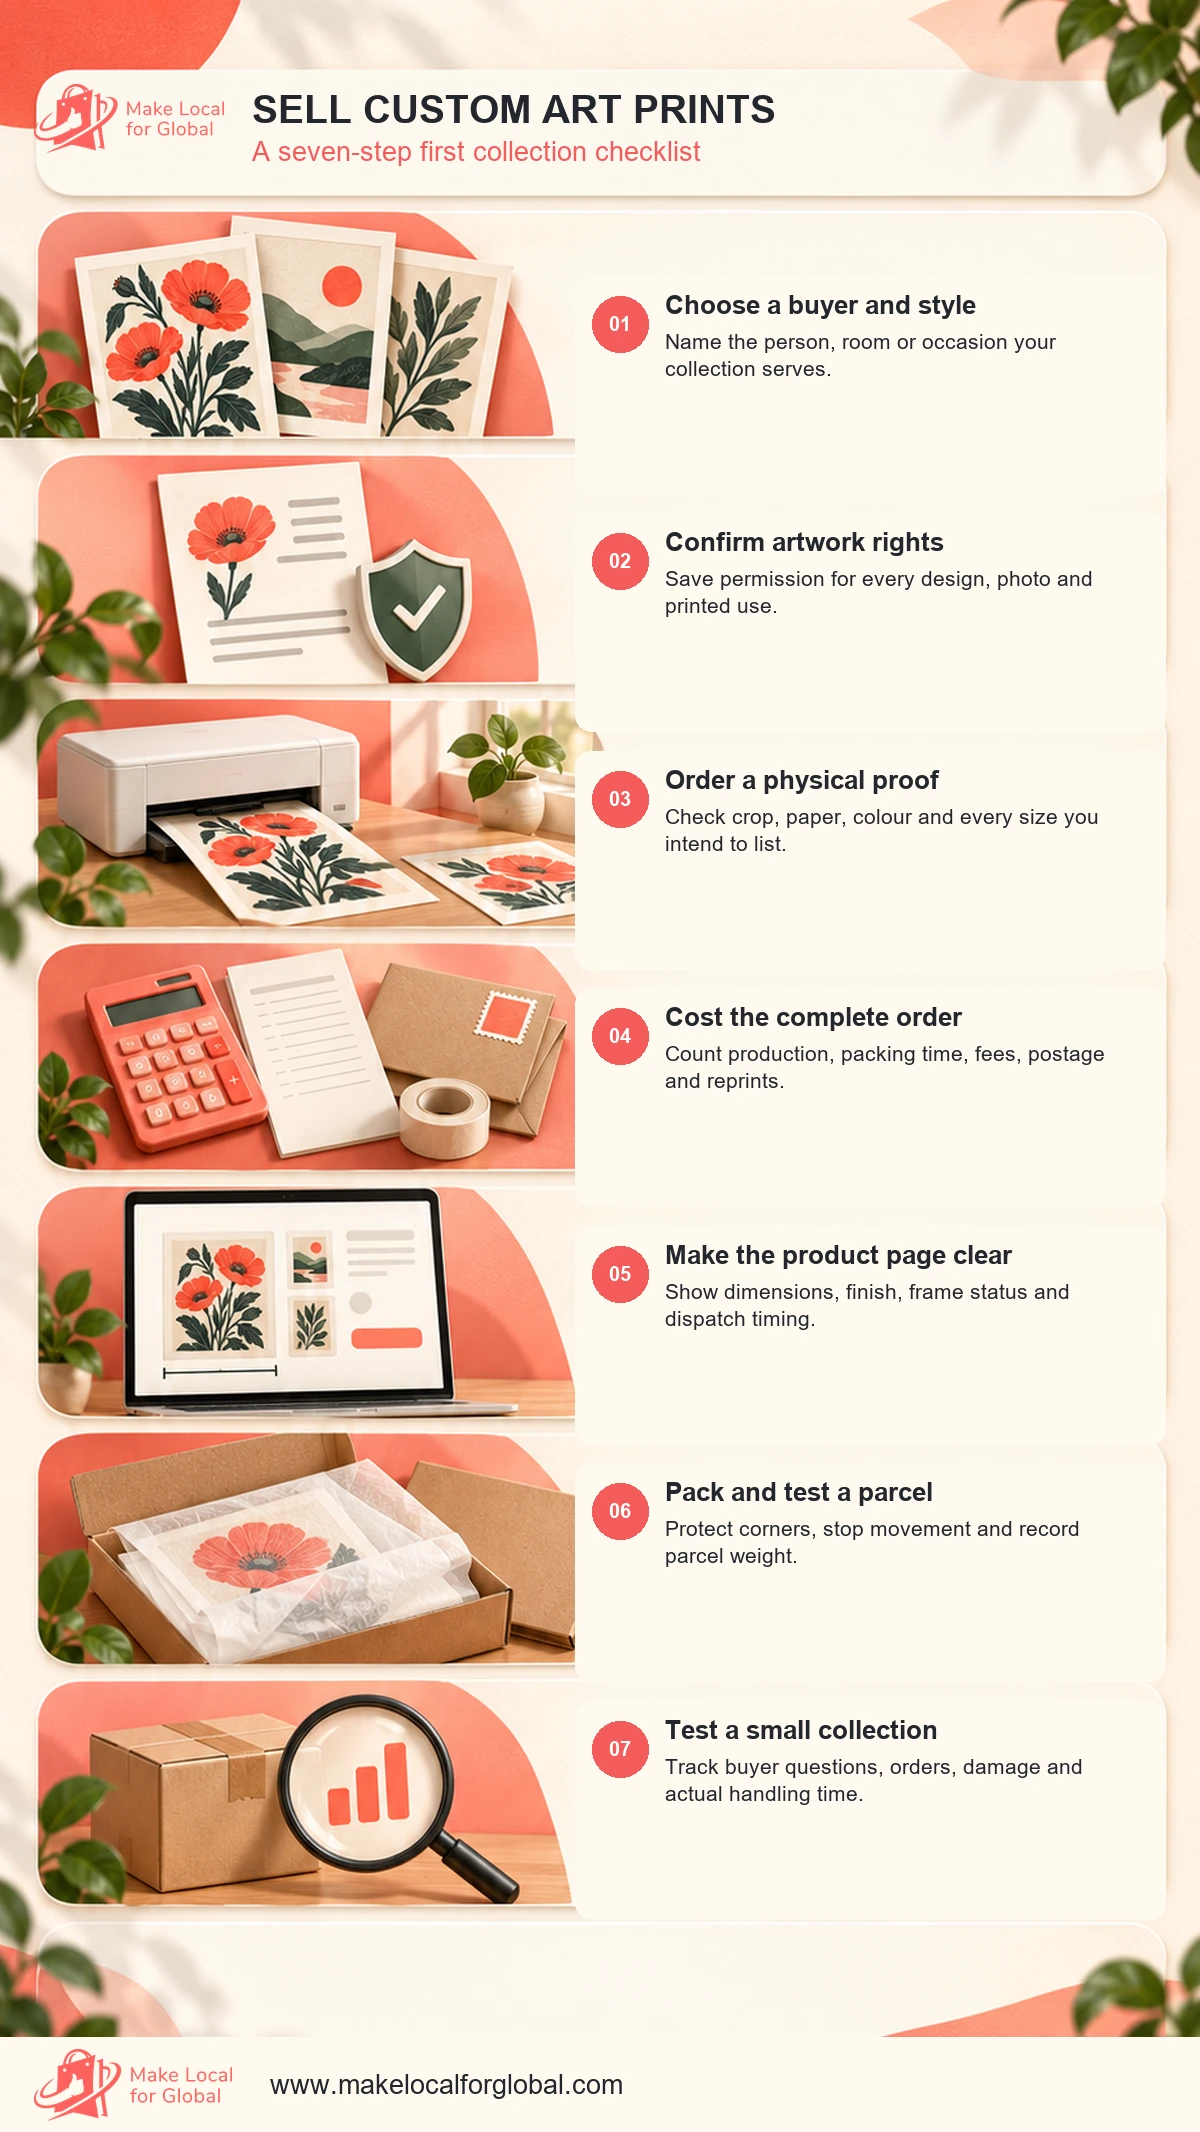
Write the buyer statement and choose a subject, visual style and buying occasion. Look at relevant listing questions without copying another artist’s work. Speak to five likely buyers and ask what size, material and frame details matter to them.
Choose a small group of artworks that belong together. Mark which designs are original, commissioned, licensed or based on supplied material. Stop any design with an unresolved reproduction right.
Select one or two sizes and one paper or surface for the test. Request quotes from two or three production routes using the same brief. Ask for a proof, print specification, delivery cost, lead time and defect process.
Write a cost sheet with blank cells for unknown values. Do not record zero for a fee or delivery cost that you have not checked. Pick the supplier route that gives you a sample you can inspect and a process you can repeat.
Order the proofs. Check paper, colour, crop, margins, detail and finish. Frame a sample if the listing will mention a standard frame. Test the proposed packaging by mailing a sample to yourself or a colleague and checking the corners and flatness.
Photograph the real product in even light. Ask someone unfamiliar with the design to tell you the size, frame status, material and delivery expectation from the page draft alone. Fix any misunderstanding.
Write the title, description, size options, edition details and dispatch estimate. Add a clear image of the actual product, a detail view and a size comparison. Add the marketplace or payment fees, packaging, carrier cost, labour, returns reserve and customer acquisition to the cost sheet.
Check the copyright folder for the work and each collaborator. Verify your cancellation information, contact details, delivery terms and any platform production-partner disclosure. Ask an adviser about issues that depend on a specific licence or personalised order.
Open a limited test listing or a small batch. Promote it to a focused audience and track product-page visits, questions, saves, sign-ups, checkout starts and paid orders. Keep the price and delivery terms visible.
Record how long production, inspection and packing take. Capture any damage, misprint or repeat question. If no one buys, do not assume the artwork is wrong; first review the visitor source, listing clarity, price and format.
Compare the test results with the assumptions written at the start. Choose to restock, revise the listing or artwork, test a different size, or pause the collection. Note the reason so the next decision is based on evidence.
If you continue, confirm the next print batch against the approved proof, update stock, photograph any changed material and check the live page on a phone. Recalculate contribution per order after the first real payment and postage statements arrive.
You need artwork that you have the right to reproduce and a product you can describe honestly. Buyers may be drawn to a particular subject, style, story or use. Test a small collection with likely buyers before investing in a large print run.
Choose a project you can make into a coherent collection and print consistently. A small, unframed size can be easier to pack than a large framed piece, but the right format depends on the buyer and artwork. Order a sample before listing.
Physical ownership alone does not give you print rights. The UK IPO says copyright usually belongs to the creator or another rights holder, and copying or distributing copies may need permission. Get a written licence that covers prints sold to customers.
In the UK, the creator will usually be the first copyright owner if there is no different written agreement. Set out whether the artist can reproduce the work, whether you can sell prints, how many, where and for how long. The agreement should cover promotion and later size variations too.
Use an open edition if you expect to print again for as long as the design is available. Use a limited edition only if you can keep a reliable count and stop at the stated limit. Explain whether the limit applies to each size or to every version of the artwork.
No. You can print in-house, use a local printer or use a third-party production partner. Compare sample quality, unit cost, lead time, packing, shipping origin and fault handling. Check whether your marketplace requires a production-partner disclosure.
Ask buyers about the rooms and frames they use, then test the artwork at the likely sizes. State whether dimensions refer to the paper or image area, and show the print next to a familiar reference. Make a separate proof for each crop or size you sell.
Include production, inbound freight, protective packing, labour, sales fees, delivery, returns or reprints and customer acquisition. Subtract those variable costs from what you receive to find contribution before fixed costs and tax. Recalculate for every size and frame option.
Do not assume that. UK cancellation rules include exceptions for goods made to customer specifications or clearly personalised, but not every product made after purchase fits that description. Faulty or misdescribed goods raise separate rights. Read current official guidance for your case.
Test the exact print and mailer. Use a rigid backing or a tested tube, stop the print moving inside the package, protect corners and select a carrier service that accepts the parcel’s size. Record damage rates and change the packaging if the same fault recurs.
Etsy’s current Creativity Standards allow a seller’s original design to be produced by a disclosed production partner. The listing needs accurate production and dispatch information. Review the current policy before listing, as platform rules can change.
Show the artwork clearly and represent the product the buyer will receive. If the frame is not included, make that visible early. Add separate images for size, paper detail, border and the print in a room, without changing the artwork’s colours.
Keep the artwork master file, rights or licence records, print specification, approved sample details, SKU, supplier, edition count if relevant, cost sheet, order record and any product complaints. These records help you reproduce the right print and respond when a supplier or customer raises a problem.
Choose one buyer, one artwork family and one size. Confirm the rights, order a physical proof and compare the actual print with the product page you plan to publish. Price the complete parcel, then test the range with a small group before making a larger commitment.
Confirm the rights, approve a physical sample and test the parcel before you expand the collection.
PREFERRED SOURCE
Like what you’re reading? Add Make Local for Global as a preferred source on Google to see more of our articles when you search.

Build your online presence without having to figure out everything yourself.