
READY TO SELL Graphic Design Prints ONLINE?
Get a store built for you in 5 days, plus training and support to help you start, run, and grow your Alternative business.

Plan a focused graphic design print range, clear the rights, prepare print files, check physical proofs, price each order and protect prints in delivery.


Graphic design prints turn original visual work into physical products buyers can display, collect or give as gifts. A seller might create a series of geometric posters, illustrated maps, typographic compositions, abstract botanical prints or editorial-style graphics, then offer the work in selected sizes and finishes.
The practical work starts before the first print is listed. Choose a buyer and collection idea, check rights for every design element, prepare files to the printer’s current specification, review a physical proof, then cost packaging and delivery alongside production. A recognisable collection and a print that arrives in good condition matter more than a long catalogue.
This topic concerns original graphic design sold as printed wall art. It does not cover freelance design commissions, graphic T-shirts, framed-only fulfilment or specialist giclée production in depth. For adjacent approaches, see how to sell graphic design services online, framed art prints, giclée prints and custom art prints.
Set a buyer, compare the first designs and record the costs that decide whether a small print range can work.
The phrase “graphic design print” can describe several products. A poster might use lettering and a strong grid. An art print could combine illustration, shape and colour. A map print might organise geographic information into a visual composition. A pattern sheet could repeat a motif for display or craft use. These products may share a visual language, but each asks for different source files, print methods and product-page detail.
Write a one-sentence description of the collection before opening a design file. For example: “A set of calm, architectural city maps for people furnishing a first flat.” The sentence gives you a way to judge whether each design belongs in the range and what a buyer needs to see in the listing.
Keep the product promise specific. Say whether the buyer receives an unframed paper print, a framed print, a digital download or another item. Do not let a staged room photograph make an unframed print look as though a frame is included.
Start with a likely use rather than an audience label such as “people who like art”. A buyer may be choosing one statement print for a hallway, several coordinated pieces above a desk, a present for a new home, or a design connected to a place or hobby. Each use affects the subject, size, set options, price and delivery expectation.
Pick one buying situation for the first collection. Describe the room or occasion, the wall space available, the colours already present, the budget range you want to test and whether the buyer needs the print ready to hang. These are hypotheses until real visitors or buyers respond.
Ask people who resemble that buyer to compare a few finished mock-ups. Show one design in a room setting and at actual product scale beside a familiar object. Ask which piece they would look at first, what is unclear about the paper or size, and whether they would buy one print or a small set. Record the wording they use. It can reveal a missing photograph or a product detail that needs explaining.
Do not count a compliment as a sale signal. Look for higher-commitment behaviour such as an email enquiry, a saved product, a request for a particular size or a paid order. If the design is not printed yet, be clear that a research page is collecting interest and is not taking payment for stock that does not exist.
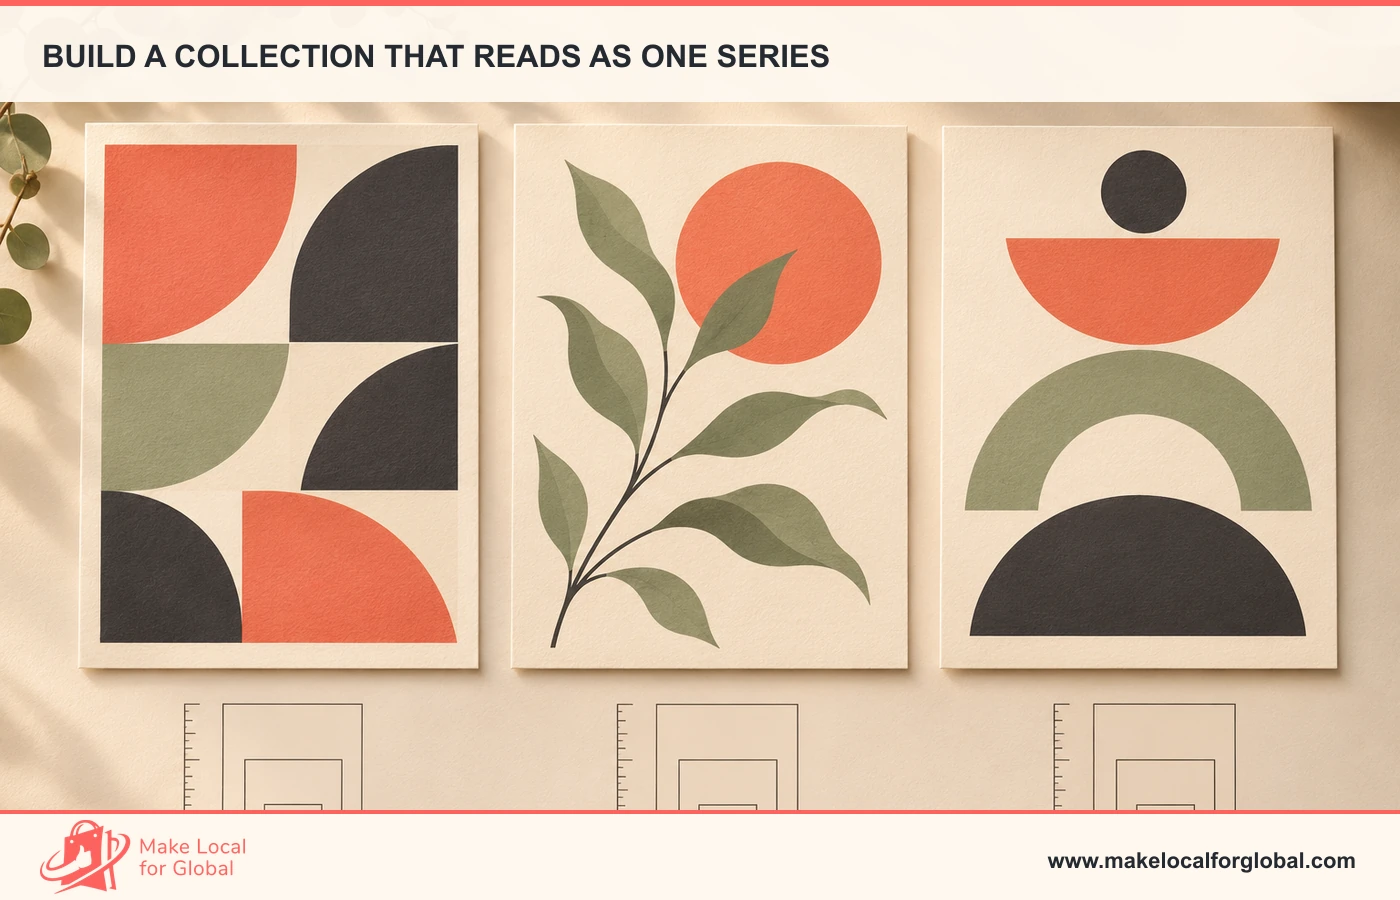
A useful first collection has a reason for being together. That might be a limited palette, a family of shapes, a subject such as local architecture, a visual rule such as one bold form per page, or an illustration method the designer can repeat without copying the same layout.
Set boundaries for the series. Choose a few colours, a small number of paper sizes, one or two related subjects and a repeatable approach to margins or borders. Boundaries help a customer see the relationship between designs. These rules help you spot a product that needs a different range or its own collection page.
For example, a collection of railway-station posters could use one grid and a consistent title position. Each print might use the station’s architectural details and a different accent colour. Before production, check that you have permission to use any protected logos or third-party material, and confirm that place names or factual details are accurate.
Avoid filling the shop with minor colour swaps that create more stock records without giving a buyer a meaningful choice. Add a variation when it answers a real preference, such as light versus dark paper, portrait or horizontal orientation, or a particular print size. Note how you will name, photograph, store and reorder each version.
Prepare a small set of finished concepts and ask potential buyers to respond to the work at a realistic scale. Use the same product information for each option, including dimensions, paper description, whether a frame is supplied and an estimated dispatch window. If those details are unknown, mark them as unconfirmed rather than presenting them as final.
You can test a print collection through a small landing page, a preview to an existing audience or a limited sample run. Measure the action that matters to your next decision: an email sign-up, a size request, an order or a question about a specific work. Keep a note of where the person saw the design and which version they viewed.
Do not take payment for a product until you can meet the stated fulfilment promise. If you are testing interest, label the page as a preview, explain that no order is being accepted and collect marketing consent separately. If you use a pre-order, confirm the delivery date and cancellation terms before checkout.
Try to learn one thing from each test. If people like the subject but ask whether the print comes framed, add a clear unframed label and a close-up of the paper. If people save a design but do not choose a size, show the print at scale. If enquiries cluster around one design, ask whether the format, price or subject made it stand out.
One design can become several products, but each format adds production and support work. A simple opening range might offer a small and a larger unframed print in one paper, plus an optional two-print set. A different seller might choose one size and test three designs first. Select the setup that lets you check quality, price and fulfilment without splitting attention across too many items.
| Format | What the buyer receives | Checks before listing |
|---|---|---|
| Unframed art print | A printed sheet, usually with a border or trim | Finished dimensions, paper, border, packaging and frame compatibility |
| Poster | A larger visual design for display | Scale, paper weight, colour, curl risk and whether a tube or flat mailer protects it |
| Print set | Two or more coordinated designs | Individual and set pricing, packing count, matching paper and consistent colour |
| Framed print | A print supplied in a frame | Frame material, glazing, hanging fittings, parcel size, breakage process and returns cost |
| Digital download | A file for the customer to print | File dimensions, permitted uses, delivery format and support for home printing |
Do not mix digital downloads into a physical-print listing without making clear which item the customer will receive. Digital content has separate rules for delivery and cancellation. See the guidance on online selling before writing terms for downloadable work.
Print sets can raise the value of an order, but a bundle should solve a display or gifting need. Show the exact number of sheets, dimensions, paper, finish and whether the art is sold only as a set. Confirm that the bundle is still economical to pack and ship when the customer lives in an area with a higher carrier charge.
Offer sizes that make sense for the design’s original proportions and for the way someone will display it. A portrait poster may suit a narrow wall; a horizontal piece could fit above a desk. A small print may work on a shelf or in a gallery wall. Avoid stretching a composition to fit a popular paper size if it changes the design or removes key detail.
Ask the printer what sizes are available and whether they use standard paper sizes, custom trim or a print area with a border. Note the finished width and height in centimetres and inches if your audience uses both. If the print includes a white edge, give the size of the full sheet and, where useful, the image area inside it.
Paper choice changes the look, handling, cost and parcel weight. A smooth coated stock can reproduce flat colour differently from a textured uncoated sheet. A heavier sheet may feel more substantial, but it can raise postage cost or require stronger packaging. Ask the printer for a paper swatch or sample set instead of relying on a screen image.
Write down the printer’s paper name, weight if supplied, surface description and any care instructions. Avoid vague quality claims such as “museum standard” when the printer has not defined the term or you cannot substantiate the claim for the exact product. If you describe a paper as recycled or responsibly sourced, keep the documentation and qualify the statement to match what the supplier has confirmed.
A seller needs a clear record of who created the work and what each licence permits. Keep original source files, creation dates, contracts, purchase receipts and licence terms together with the final print file. A folder per design can include a master, exports, proof photographs and a short rights note.
In the UK, the creator usually owns copyright in an original artistic work, subject to exceptions such as work created by an employee in the course of employment. A client commissioning design work does not automatically become the copyright owner in every case. The Intellectual Property Office explains copyright ownership and gives an overview of protecting creative work. Get legal advice if a contract or joint contribution leaves ownership unclear.
Check fonts, stock illustrations, textures, photographs, brushes, templates, symbols and other assets used in a print. A licence may allow use in a portfolio or a client project but restrict distribution on products for sale. Read the current licence for the exact resource and keep a dated copy. A purchase receipt alone does not prove that commercial print sales are allowed.
Be especially careful with logos, characters, album art, sports marks, celebrity images, film references, maps, quotations and recognisable designs. Changing a colour or adding a border does not automatically give you permission to sell a derivative work. The Intellectual Property Office’s digital images and internet copyright notice explains that copying a substantial part can raise copyright concerns even when the full work was not reproduced.
If a freelance designer creates part of the collection, agree in writing which uses are permitted, where the work can be sold, whether the seller can resize or adapt it, whether the creator can license the same work elsewhere and how attribution will appear. Specify whether the agreement grants a limited licence or transfers rights. Do not assume that paying an invoice transfers all copyright.
Ask each printer for its file template, preferred format, colour instructions, trim and bleed requirements, safe area, maximum file size and any embedded-profile requirements. The answers can differ by paper, printing method and provider. Follow the current product template instead of relying on a universal rule copied from a tutorial.
For raster artwork, check the pixel dimensions at the final physical size. Adobe describes 300 pixels per inch as a common target for high-quality print work, with viewing distance and print size affecting the result. Its print-resolution guidance explains why enlarging a small file does not restore detail. Vector artwork can remain sharp at different scales, though embedded raster elements still need enough resolution.
Confirm whether the printer wants RGB, CMYK or a specific PDF/X export. Keep a colour-managed master and convert only according to the printer’s directions. Colours shown on a backlit monitor may not match ink on paper; ask for a physical proof before committing to a large batch. Adobe’s commercial print preparation notes recommend asking the prepress provider which colour workflow and file profile it needs.
Check the document size, crop, margins, bleed and safe area. Keep small type and fine lines away from the trim edge. Inspect the exported file at print size to catch hairline rules, accidental transparency, missing fonts, stray marks or a crop that cuts into the composition. Open the exact file you intend to send, not only the editable master.
Name exports so the design, size, orientation and revision are obvious. A file name such as `station-series-04-A3-portrait-v03.pdf` is easier to trace than `final-print-new.pdf`. Use a version log when you change the crop or colour, and do not overwrite a file already used by an order without checking what the printer will produce.
Three common routes are a print-on-demand provider, a local or regional print studio, and a batch order stored and dispatched by the seller. Each route trades control, cash tied up, delivery time and per-unit cost differently. Compare actual quotations for the same file, size, paper and delivery destination.
| Route | Helpful when | Questions to ask |
|---|---|---|
| Print on demand | You want to test several designs without holding many finished prints | Who prints and ships, paper choices, file warnings, reprint process, branding options and delivery times |
| Local print studio | You want to review samples and discuss a specific paper or finish | Proof cost, minimum quantity, repeat-order consistency, file setup, trim tolerance and collection or courier options |
| Small batch held in stock | You have evidence for a design and can pack orders yourself | Minimum run, storage conditions, unit cost, damage rate, packaging, replenishment time and unsold stock risk |
Print-on-demand services can reduce upfront stock purchases, but the per-order price, shipping route, quality control and packaging options need checking. A provider may fulfil only certain sizes or papers in a destination. Read that provider’s current specification and order samples before you publish the full collection.
A local studio can make it easier to review paper and colour in person. Ask how it handles repeat runs, file changes, colour profiles, small quantities and rejected sheets. Agree what counts as a defect and how reprints are handled. A one-off sample does not prove that a later batch will use identical settings.
Batch printing can improve unit cost at a quantity that matches demand. It ties cash up in stock and makes you responsible for storage, packing, dispatch and quality checks. Start with a run size you can afford to sell through, not the largest quantity that makes the quoted unit price look attractive.
Ask suppliers for a written quote that identifies the exact paper, size, print method, trim, packaging and shipping route. Request a sample of the proposed product, not a generic brochure swatch. Confirm whether the quote includes setup, proofing, tax, courier, packaging or any handling fee.
Ask how the provider handles colour conversion and whether it can use an embedded profile. Confirm which file formats it accepts, whether it checks files before printing and how it reports a low-resolution warning. Ask if the provider will contact you when a file is unsuitable, or print it as supplied.
For print-on-demand, verify where each order is produced, how tracking is issued and what happens when the print arrives damaged. If production is overseas, check the full delivery estimate, import charges, return address and responsibilities for a replacement. A low unit price does not describe the customer experience by itself.
Write down service details by product option. A provider may offer a paper in one size but not another, or use a different dispatch facility for a framed print. Keep each SKU tied to the exact production option so that the listing, supplier order and customer confirmation describe the same item.
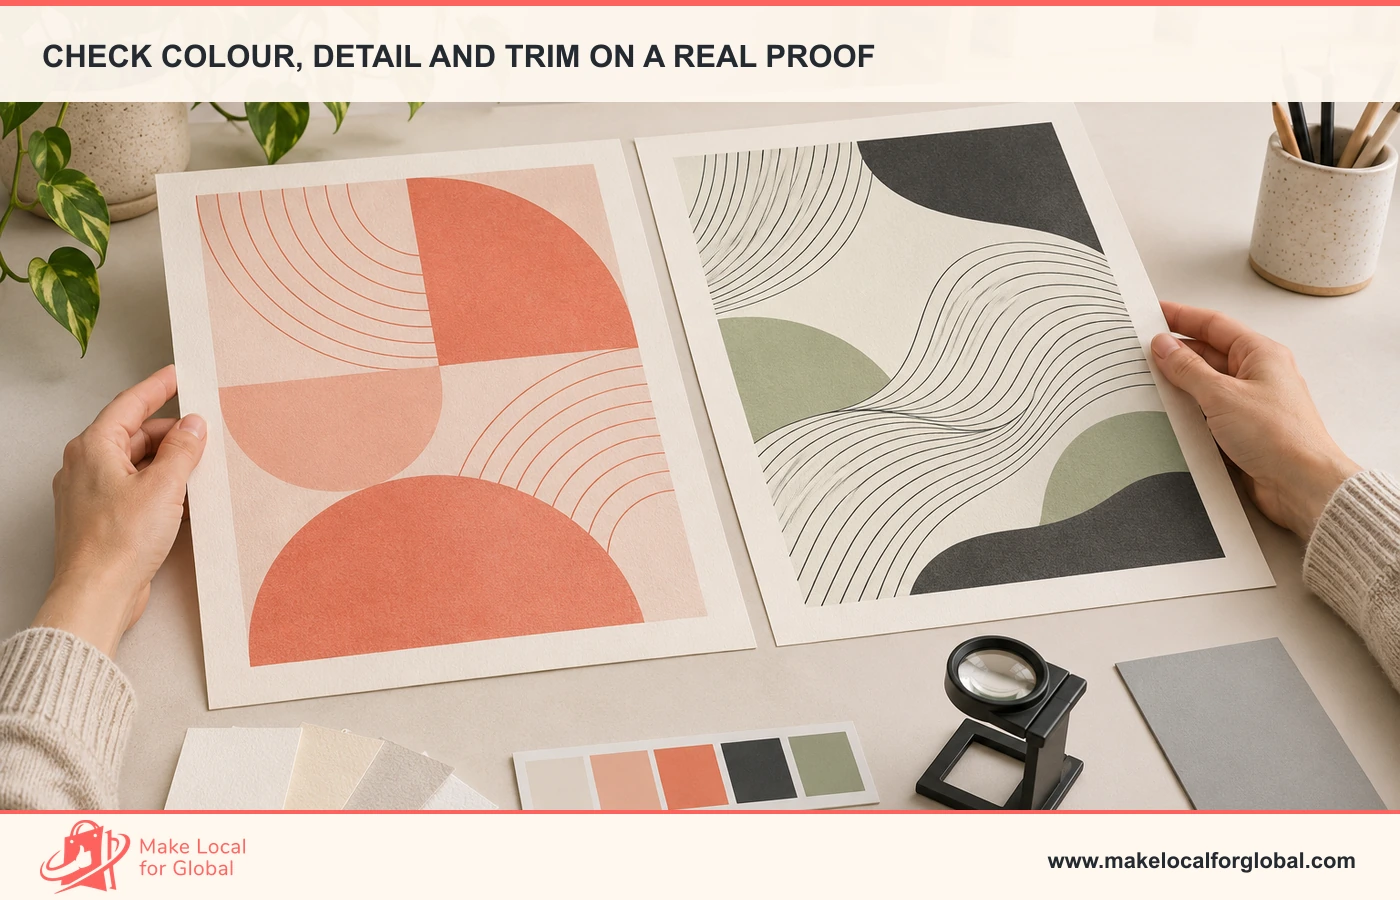
Review a sample in daylight and under the kind of room lighting where a buyer may display the print. Compare the print with the approved artwork on a calibrated screen if you have one, but use the physical paper as the final check for texture, finish and handling. A screen mock-up cannot show how a matte surface reflects light.
Use a checklist for each proof:
Make a simple record with the supplier, order date, file revision, paper, print size, proof result and decision. Photograph the sample beside its packaging. If you ask the printer to change the colour or crop, save the instruction and request another proof when the change affects the visible result.
Give a sample to someone who did not design it. Ask them to identify the size, surface, border and whether a frame is included from your product page alone. If they cannot tell, improve the photos or copy before taking payment. This test finds confusing presentation, not future demand.
Use a product name that identifies the subject or design series and the physical format. “North Line No. 04, A3 unframed geometric art print” gives a buyer more information than “New poster”. Keep each size as a clear variation if the design is otherwise the same, and name the paper and border in the option details.
Show the artwork at full view, close enough to see line quality and paper texture, and in a room scene with a scale reference. Include a photograph without the frame if the frame is not supplied. If you use a mock-up, label it as a styling image and avoid changing the print’s proportions or colour.
Answer the product questions before checkout. State:
Use accurate alt text that describes the actual image, such as “coral and charcoal geometric art print on textured ivory paper”. Do not repeat the product name as a keyword string on every image. Add a second image of the packaged print if it helps explain how the order arrives.
Write a short description around the design’s subject and use. You can explain why the series uses a repeated grid or a local reference, provided that the story is true. Avoid unsupported claims about archival life, pigment, paper origin, colour permanence or environmental impact. Ask the printer for evidence before making a technical claim.
Start with the amount the customer pays, then remove tax where it applies and subtract every variable cost. A basic print cost is only one line. Count proof and setup where applicable, packaging, pick and pack, postage, payment fees, marketplace charges, advertising, damage or reprint allowance and the time spent handling an order.
The example below is hypothetical. It assumes a UK VAT-registered seller charges standard-rate VAT at 20% on a delivered physical print. A £38 customer price including VAT contains £6.33 output VAT and leaves £31.67 net sales before costs. VAT treatment, recoverable input tax and any reduced or exceptional rate depend on the transaction and advice from an accountant.
| Illustrative delivered A3 print order | Amount |
|---|---|
| Customer payment including VAT | £38.00 |
| Net sales value before output VAT | £31.67 |
| Print and supplier fulfilment | £9.00 |
| Protective sleeve and rigid mailer | £2.15 |
| Seller handling allowance | £1.50 |
| Delivery charge paid by seller | £4.50 |
| Payment processing allowance | £1.40 |
| Customer acquisition allowance | £3.50 |
| Damage, return and reprint allowance | £1.75 |
| Total variable costs used in this example | £23.80 |
| Contribution before overhead and tax | £7.87 |
The arithmetic is £31.67 net sales less £23.80 listed costs, leaving £7.87. That is contribution, not profit. It does not pay for software, photography, design time, storage, accounting, insurance, fixed staff costs or unsold stock. It assumes that the cost lines exclude recoverable VAT; replace them with your own figures and confirm tax treatment before using the calculation.
Check what happens when one cost changes. If a rigid mailer adds £1, the contribution falls to £6.87. If an advertising test costs £6 per order rather than £3.50, it falls to £5.37. If a customer buys a two-print set in one parcel, production and packaging may rise, but the second print might not double postage. Calculate the actual order rather than applying a blanket percentage.
Compare each size separately. A larger print can sell for more but may cost more to produce, need a stronger mailer and trigger a higher parcel rate. A small print can be easier to ship yet carry a fixed payment fee that uses a larger share of the sale. Record a contribution figure for each product and review it after orders arrive.
Do not set a price by copying another designer’s listing. Their print size, paper, audience, service, tax status and production quantity may be different. Set a minimum contribution you need for the time and risk involved, test whether a buyer will pay that amount, and change the offer if the result does not work.
An open edition can be reordered for as long as you keep the design available. It needs dependable file records and a process for checking print consistency. A limited edition is a fixed quantity, so number and record each copy accurately. Explain what “limited” means and do not reissue the same edition after saying it is closed.
A small set can make a collection easier to buy as a group. Set a clear number of prints, name the pieces, show them together and state whether each sheet can be purchased separately. Keep the bundle price and single-print prices visible so buyers can judge the value without doing arithmetic.
Personalisation adds proofing and customer-service time. If a buyer can add a name, date or location, define which parts can change, the number of proof rounds, the approval deadline and what happens when the buyer does not reply. Do not promise a dispatch date that assumes instant proof approval.
Limited quantities and customisation can change consumer cancellation rights. Do not assume that every print produced after an order is automatically exempt from cancellation. Get advice on the exact offer and explain the rules before the customer orders.
An independent shop gives you control over product pages, collection presentation and customer information. You are responsible for bringing in visitors, describing the item accurately, handling checkout and replying to order questions. Confirm that the store can show size options, shipping costs and an accurate dispatch estimate.
A marketplace can introduce your work to shoppers already browsing, but it may set fees, image rules, shipping fields and seller policies. Read the current terms before building the range around a marketplace feature. Keep a copy of your listing and order details in your own business records.
A print-on-demand integration can send orders directly to a production partner. Check the product mapping, tax settings, dispatch origin and customer-facing tracking from a test order. Make sure your shop does not show an option that the provider cannot produce. The seller remains responsible for the promise made on the storefront.
You can combine channels, but keep the product information consistent. A design called “Station Series 04” should not have different dimensions or paper descriptions on the shop and marketplace. Use one master specification and update each channel when the printer changes the product.
Use phrases that describe what a buyer is trying to find, such as “geometric art print for a hallway”, “A3 abstract poster”, “coordinated print set for a gallery wall” or the name of a place depicted in the work. These are examples to research, not a forecast of search traffic or demand.
Give each collection page a clear subject, a short description and links to the individual prints. Give each product page its own size, medium and edition details. Avoid making several pages with nearly identical copy just to repeat a phrase. A buyer who searches for the design needs enough information to decide if the print is right for their wall and budget.
Create supporting pages only when they answer a real question. A size guide can show A4 beside A3 and A2. A paper guide can compare the actual stocks you sell. A care and framing page can use advice confirmed by your printer. Link those pages to relevant prints so a reader can move from learning to the product option.
Add a concise title and description that match the page content. Describe the art as it is rather than writing a string of synonyms. Use headings for useful sections such as size, paper, delivery and edition information, not repeated variations of “graphic design prints”. Search visibility depends on many factors; no wording guarantees a position or a sales result.
Choose one channel where the intended buyer already looks for design ideas. A designer might share a behind-the-scenes clip of an original composition, a room-scale image, a paper proof comparison or a carousel showing how a series works together. Make each post useful on its own and link it to the matching collection or product.
Use the same link tracking for a short campaign so you can tell whether a post, email or partnership drove a product-page visit. Compare product-page views with saves, questions, add-to-basket actions and completed orders. A post with many views and no product interest may need a clearer audience or a better call to action.
Ask a homeware shop, local gallery, interior stylist or event organiser whether a small collaboration makes sense. Agree wholesale price, payment timing, display period, damaged stock process, usage rights for promotional images and who handles unsold work. Confirm whether the partner needs an invoice or product data before delivering stock.
Do not give away every design file for a feature or competition without checking where the image can be reused. A promotional licence can be limited to named channels and dates. Keep the original artwork and a record of approved promotional uses.
Map each design to its size, format, buyer and full order cost before you add more products.
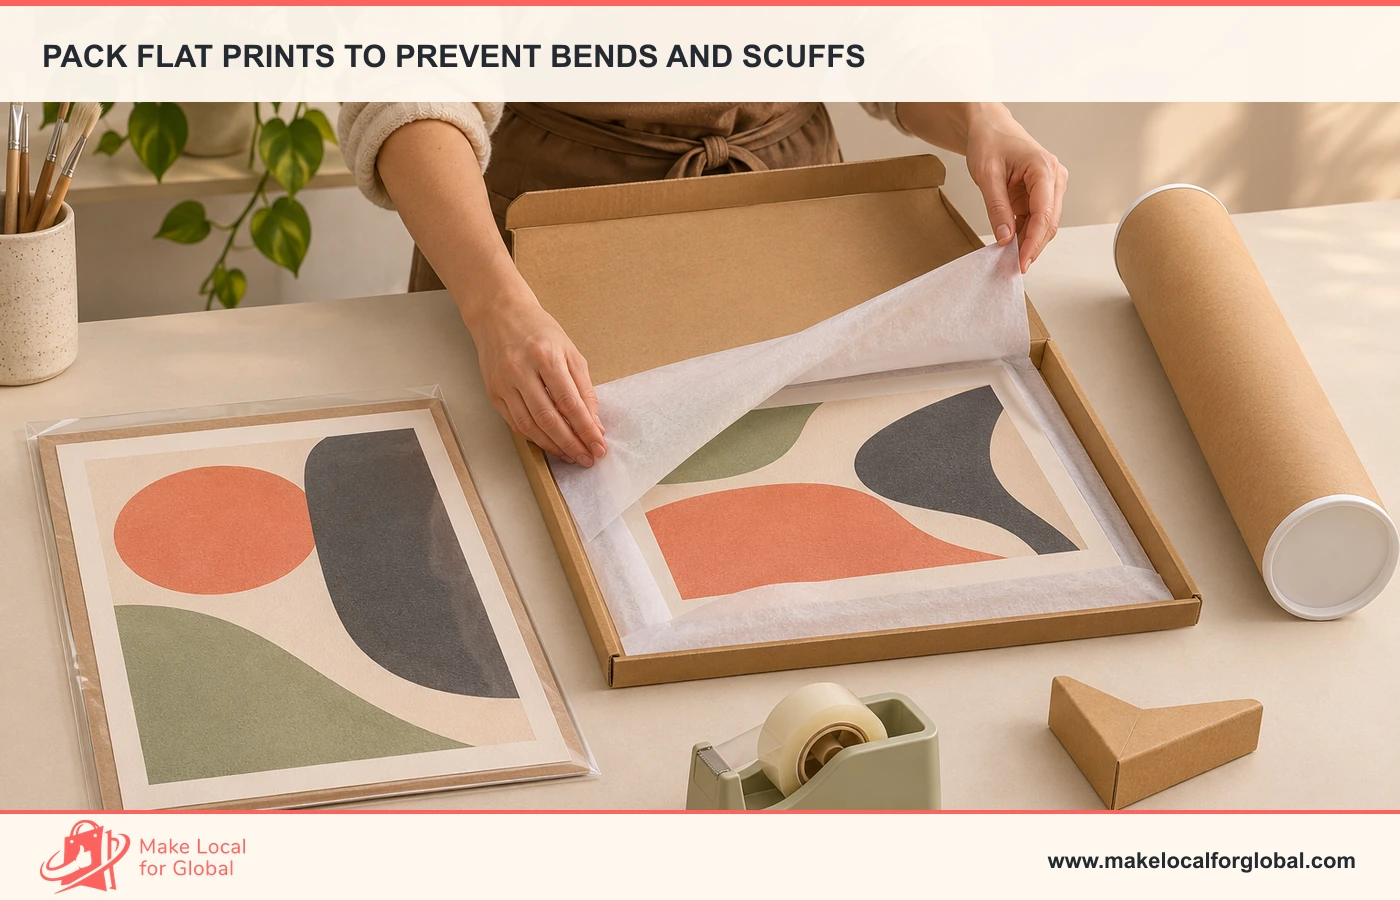
Choose the package after checking the finished print and the carrier’s current size limits. A rigid flat mailer may protect a small or medium sheet from bending. A tube can suit some larger unframed posters, but rolling can leave a curl and may not suit heavy or textured paper. Test the product after it has been packed and unpacked.
Use a clean protective sleeve or tissue that will not transfer ink, scuff a surface or trap moisture. Add a rigid backing board where it helps the chosen mailer stay flat. Seal the package so the print cannot slide out, but avoid placing adhesive where it can touch the art. Keep any glass, frame or mount components separate from the print where the supplier recommends it.
Measure the packed order, not just the paper. Confirm length, width, depth and weight for each product and bundle. Check the actual carrier rate for representative postcodes and include surcharges, collection charges or remote-area restrictions in your delivery plan. A package that is only slightly larger can move into a different service band.
Pack one test parcel and inspect it after a sample delivery. You can ship it to yourself or ask a trusted person to photograph the exterior before opening. Look for crushed corners, moisture, surface rub, slipping inserts and a delivery label placed over a weak section. Change the packing method when the test reveals a failure.
| Order type | Packaging checks |
|---|---|
| Small unframed print | Sleeve, rigid backing, flat mailer size and corner protection |
| Large poster | Tube diameter, roll direction, end caps, curl after opening and carrier acceptance |
| Print set | Sheet count, separators, set label, combined weight and no abrasion between sheets |
| Framed print | Corner protectors, glazing protection, frame movement, parcel drop risk and damage cover |
If you ship framed work, price the higher parcel dimensions and keep photographs of packing steps. Use a carrier service that accepts the parcel and offers a damage process suitable for the product. Do not advertise a “safe arrival” promise you cannot support with your packing and carrier arrangement.
A seller who packs orders should record the packaging materials and quantities used. UK extended producer responsibility rules can apply to some businesses that supply or sell packaged goods. The current GOV.UK packaging EPR checker sets out who may have reporting or fee duties and includes current thresholds. Check your business facts and the latest guidance rather than assuming that a small print shop is exempt.
Describe the packaging accurately. A paper mailer is not automatically recyclable in every local collection scheme, and a “plastic-free” claim can be misleading if tape, sleeve or label components use plastic. The Competition and Markets Authority’s Green Claims Code says businesses must support environmental claims. Keep supplier evidence for recycled content, certifications or disposal instructions and state the limits clearly.
Use the least material that protects the print through the actual route. A thin package that causes repeated damage can waste more stock and time than a slightly stronger mailer. Compare packaging cost with the replacement cost and the likelihood of damage using your own order records.
Before checkout, tell buyers who is selling the print, what they will receive, the full price, delivery cost or calculation, payment method and expected delivery. The GOV.UK page on online and distance selling lists information online traders must provide and says the customer must receive contract details they can keep.
For goods bought online, customers usually have a right to cancel within 14 days after receiving an order, with some exceptions. The GOV.UK refunds guidance explains distance-sale cancellation and refund requirements. A personalised item may be treated differently from a standard print, but do not assume that print-on-demand or printing after an order removes cancellation rights. Review the offer and get legal advice before writing a blanket “no returns” statement.
Your policy should describe how to report a parcel that arrives bent, wet, marked or incomplete. Ask for the order number and photographs that help identify the problem, then give a response time and next step. Do not ask a buyer to resolve the issue with your printer before you have reviewed the order and your obligations.
Keep records of the listing shown at purchase, order confirmation, production file, packing checks, tracking and any replacement or refund. If the same print arrives damaged several times, compare the packaging, carrier route and supplier before continuing to ship the same way.
Give each design and option a SKU that captures series, design number, size, paper, orientation and edition status. Keep unframed and framed products separate in the inventory record. A label should identify the product without covering the artwork or print information.
For small batches, store prints flat in a clean, dry place away from direct sunlight, dust and heavy objects. Use interleaving or protective sleeves that suit the paper. Follow the printer’s storage notes, especially for sensitive or coated stock. Check the stack before packing an order rather than assuming that every sheet from one batch is perfect.
For print-on-demand, inspect a sample whenever you change supplier, paper, file profile or print size. Order a new proof if the provider changes production method or output location. Keep an approved sample image and note which file revision produced it.
Prepare short replies for common questions: whether the frame is included, whether colours look different on screen, how a print is packed, whether a set can be split, what a custom order changes and how to report damage. Use those questions to improve the product page. If you cannot confirm a material or delivery detail, ask the provider before replying with a guess.
Track the work required per order. A print that earns a contribution but requires repeated manual editing, custom proofing and one-off packaging may not be a good fit for a small opening range. Record the time and build it into the price or simplify the offer.
Use a month to complete the early checks. The calendar depends on sample and printer lead times, and it does not promise that the collection will sell. Write down a result at the end of each week so the next action follows evidence rather than enthusiasm alone.
| Week | Work to complete | Evidence to keep |
|---|---|---|
| 1: Choose and test | Pick one buyer, define the collection idea and compare a few designs with likely customers | Responses, requested sizes, unclear details and any higher-commitment interest |
| 2: Clear rights and files | Check ownership and licences; prepare final-size exports to the chosen printer’s template | Rights record, source files, export names and printer specification |
| 3: Approve a sample | Order a proof, review colour, trim, paper and packaging, then request a correction if needed | Proof photos, inspection notes, approved file revision and delivery quote |
| 4: Publish a small range | Add a few products with complete photos, price, delivery details and an order-support process | Test order, contribution calculation, buyer questions and dispatch result |
At the end of Week 1, remove a design if it does not fit the range or if the rights record is incomplete. In Week 2, fix file problems before paying for a run. In Week 3, approve the physical sample only after the crop, paper and packaging meet your stated product promise.
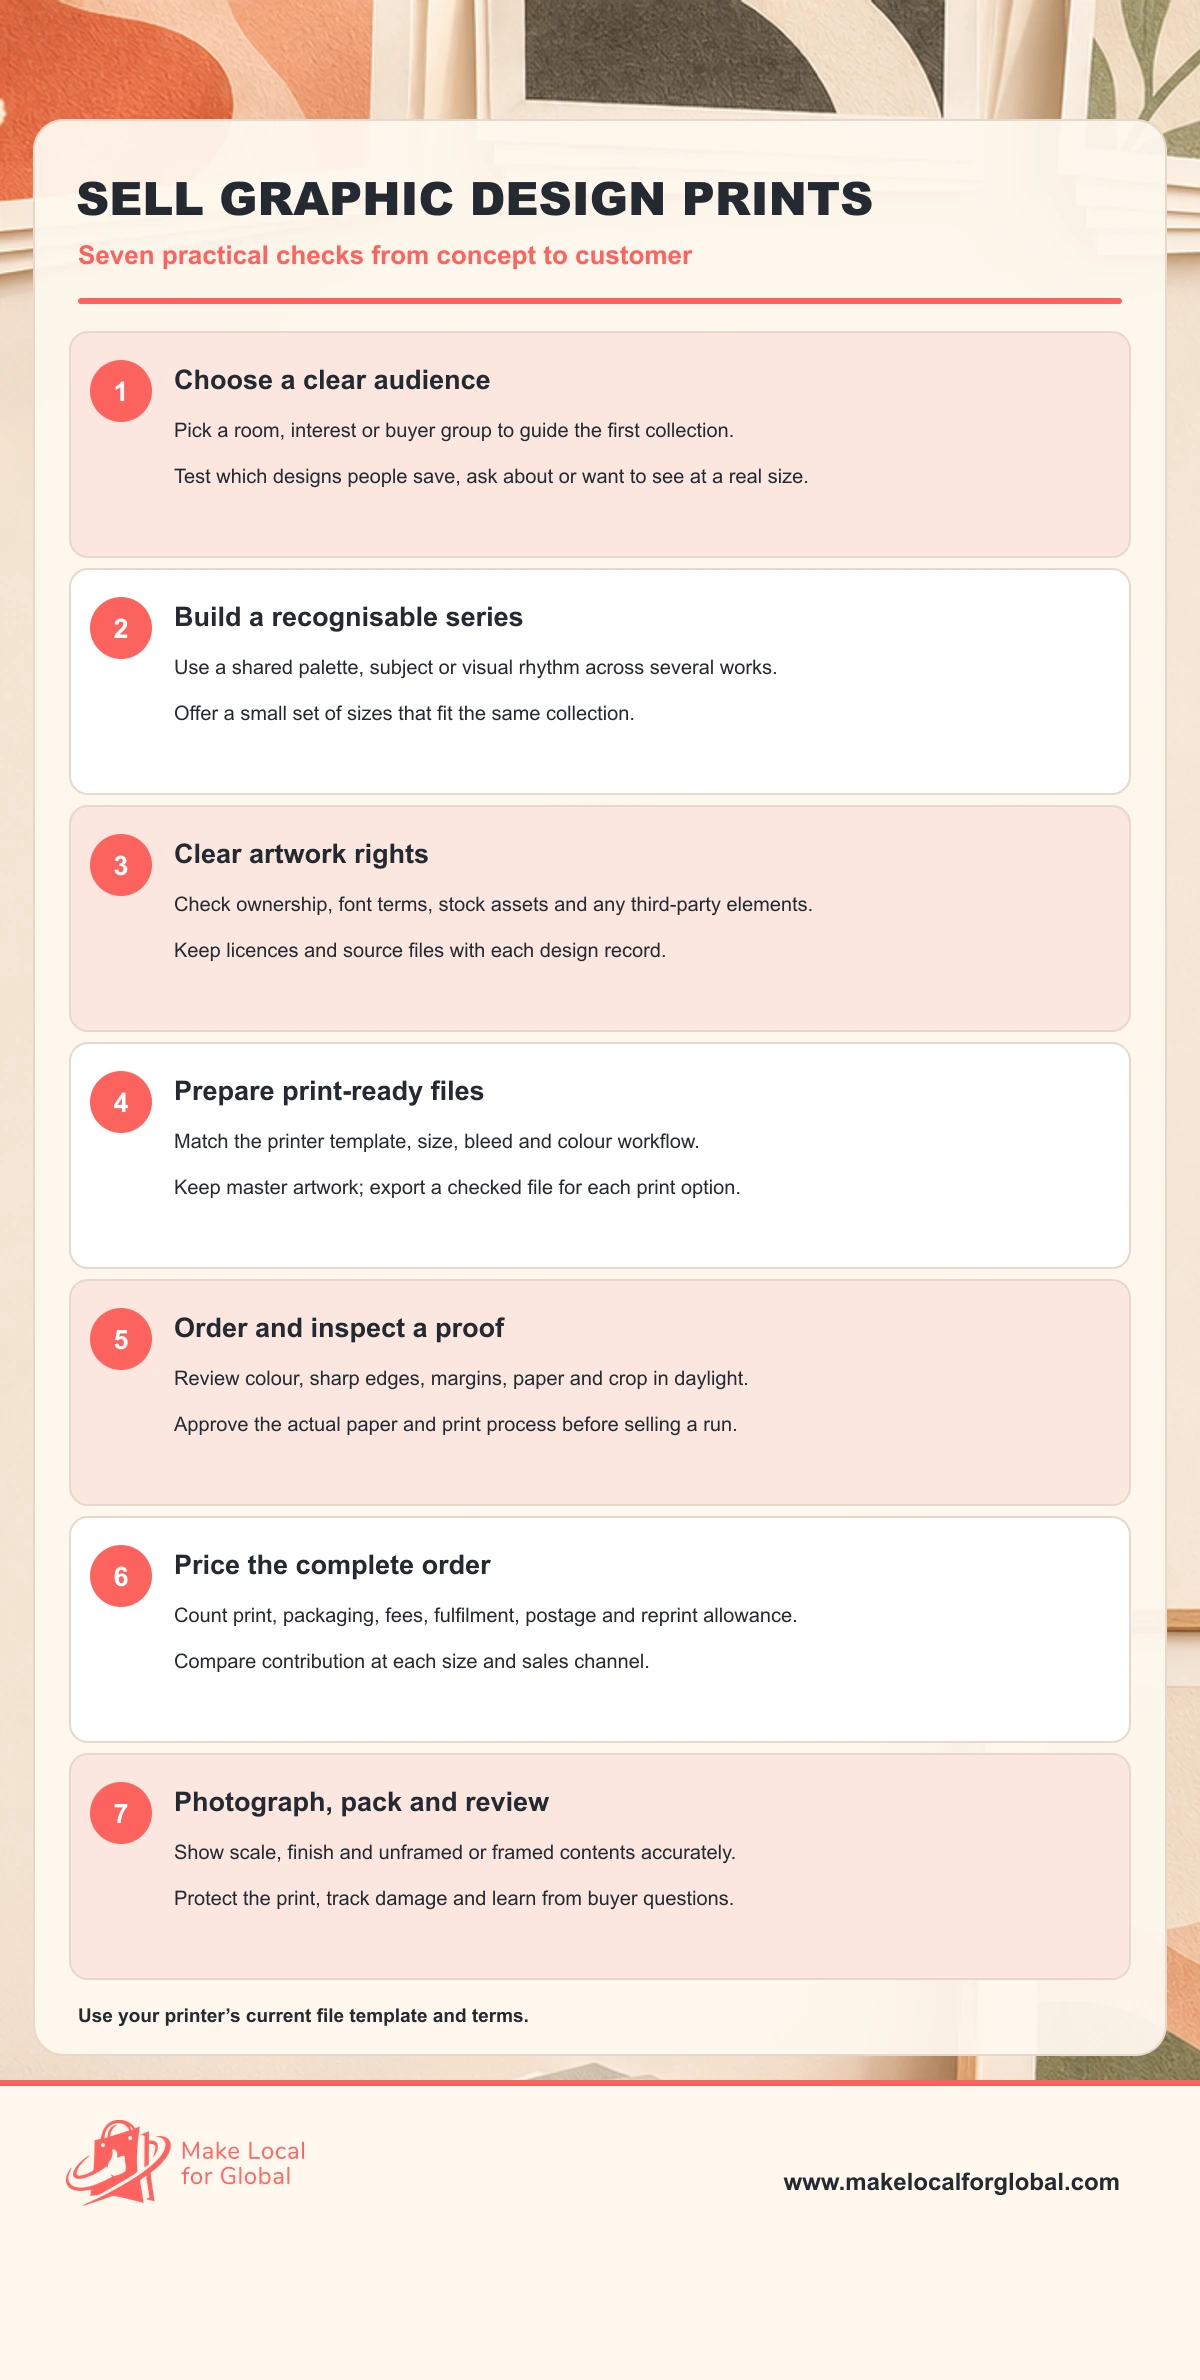
When you publish, make one test order from the buyer’s perspective. Check the product variation, tax display, delivery charge, confirmation email and tracking flow. If a provider handles fulfilment, inspect the parcel and the customer-facing notification. Correct a confusing option before sending the launch announcement.
Review early orders by design and size. Keep a note of contribution after variable costs, questions, damage reports, replacement time and which photos people respond to. Add a new design only when there is room to produce and support it.
Listing every design before checking demand. A large catalogue makes image quality, rights and inventory harder to monitor. Start with a coherent collection and use buyer questions to decide what to add.
Treating a screen preview as a colour proof. Display settings and paper change how colour appears. Order the actual stock and inspect it in ordinary lighting.
Upscaling a small file and expecting detail to return. Increasing pixel dimensions does not recreate sharp lines or texture that were absent in the source. Prepare the work at the needed scale or use vector artwork where appropriate.
Using a font or stock element without checking its terms. A design asset that is licensed for online display may have limits on commercial print products. Keep a licence record for every asset used.
Showing a frame that is not included. A room mock-up can set a false expectation. Pair styling photographs with an unframed product image and say exactly what the customer receives.
Pricing from the print quote alone. Packaging, postage, payment fees, advertising and damage can consume the remaining contribution. Calculate each size and channel separately.
Promising that a limited edition is exclusive without records. Number the run, note the production quantity and keep the count tied to the design. Avoid a scarcity claim that you cannot prove.
Treating print-on-demand as hands-off. A fulfilment provider does not remove the need to check the sample, listing, parcel and customer contact route. Test the complete path before launch.
Writing a blanket return exclusion. Standard online goods and made-to-order or personalised items can be treated differently. Get advice on the actual product and write terms that match the rules.
Start with a small collection that serves one buyer or display need. Choose a few designs with a shared idea, then test a limited set of sizes and paper options. Use real questions and orders to decide which piece should stay.
You need artwork that you have the rights to sell, files that meet the print supplier’s specification and product information that accurately describes the item. A formal design qualification is not a substitute for rights clearance, proofing or customer research.
It depends on the final size, image type and printer. Around 300 pixels per inch is a common starting point for detailed raster print work, but follow the provider’s current template. Vector art can scale cleanly, though raster images inside it still have their own resolution.
Ask the print provider which workflow it accepts for the specific product. Some providers request RGB with an embedded profile; others specify CMYK or a PDF/X file. Do not convert automatically without checking the provider’s directions and reviewing a physical proof.
It can reduce the need to buy stock before you have evidence, but the provider’s unit price, product options, delivery times, quality and returns process affect the buyer’s experience. Order a sample and calculate the contribution for each size before publishing.
Only if the licence allows the way you plan to use it. Check whether it covers products for sale, print quantities, modifications and any restrictions. Save the licence terms and ask the rights holder when the terms do not answer your intended use.
Not automatically in every case. The contract should state who owns the copyright or what licence the seller receives, including product types, channels, territory, duration and modifications. UK Intellectual Property Office guidance explains that commissioned work may remain with the creator when the contract does not assign rights.
Online cancellation rights can apply to goods, and exceptions depend on the circumstances. Do not assume that producing a standard print after the order makes it personalised. Check current consumer guidance and get advice on the exact product and terms.
Use a package accepted by your carrier and suited to the paper and print finish. A rigid flat mailer and a protective tube have different handling and curl trade-offs. Test the packed print, measure the parcel and explain the delivery method clearly.
Add the production cost of every sheet, set packaging, handling, carrier cost, fees, customer acquisition and a realistic damage or reprint allowance. Compare the set’s contribution with the combined single-print orders and confirm the price still works at the destinations you serve.
Use a specific claim that you can support with supplier documentation. A paper stock, recycled-content percentage or packaging component should be described accurately, with limits made clear. Review the CMA Green Claims Code before making broad environmental statements.
There is no fixed quantity that fits every seller. Base a batch on the cash you can risk, storage space, supplier minimums and the demand evidence you have. If you use print-on-demand, limit the live range to products you have sampled and can support.
Track product-page visits, questions, orders by design and size, contribution after variable costs, damage, returns, dispatch time and the time you spend on support. Use those records to change a specific part of the range or product page.
Use proof notes, customer questions and order costs to choose what to adjust in the range.
PREFERRED SOURCE
Like what you’re reading? Add Make Local for Global as a preferred source on Google to see more of our articles when you search.

Build your online presence without having to figure out everything yourself.