
READY TO SELL Flannel Shirts ONLINE?
Get a store built for you in 5 days, plus training and support to help you start, run, and grow your Alternative business.

Learn how to sell flannel shirts online by checking samples, measuring fit, pricing each packed order and giving buyers clear fabric and returns information.


To sell flannel shirts online, start with one clear wearer and one fit you can measure, then prove the fabric, construction and care details on a physical sample. A buyer cannot feel a brushed surface through a screen, and a size label alone will not tell them how the shirt fits over a T-shirt or under a jacket. Your first offer needs accurate garment measurements, useful close-up photos and a cost for the parcel that will actually leave your door.
Flannel is a product description, not a shortcut for fibre composition or performance. Ask the supplier what the shirt is made from, how it is finished, what the care label says and whether the production sample matches the paperwork. Start with a narrow range, inspect each size, price one packed order and use buyer questions to decide what to add.
Turn a buyer, fit and sample checklist into a small range you can inspect and explain.
Do not begin with a list of colours. Begin with a person, a setting and a reason they choose a flannel shirt instead of another layer. One buyer may want a soft casual shirt for everyday wear. Another may be looking for a substantial overshirt to wear over a base layer. Someone else may be buying a gift and need clear sizing, fabric information and a return route.
These are starting hypotheses, not proof of demand. Speak with people who already buy similar shirts and ask about their last purchase: what they wore it for, what fit they chose, what they checked before paying, what they liked after wearing it and what they would change. Ask what they returned and why. A specific account of an actual purchase gives you more to work with than a quick “Would you buy this?” response.
Write a one-sentence buyer description. For example: “I am testing a relaxed-fit checked shirt for someone who layers it over a T-shirt, wants room through the chest and needs a cuff that can be rolled.” That statement helps you choose a sample, decide which measurements to publish and plan the photographs. It does not mean every person who wears a shirt in that way shares the same preferences.
Customers use “flannel shirt” for garments that may be worn as a shirt, a light outer layer or both. The cut and construction affect how the product should be described. A close-fitting style intended to sit under a jumper needs different measurements from a relaxed layer with room for another garment underneath.
Ask the maker for the intended fit and the garment’s finished measurements. Check whether the shoulders, chest, sleeve opening, hem and length support the description “regular”, “relaxed” or “overshirt”. Those words mean little on their own. Show how much room the actual sample has, and explain what a buyer can reasonably wear beneath it.
If the shirt is sold as workwear, describe only the features you can verify, such as pocket layout, fabric composition or reinforcement. Do not imply protective performance or personal protective equipment status without the applicable evidence and compliance work. A thick-looking fabric in a photograph is not proof that a garment protects someone from weather, heat or workplace hazards.
Use conversations, a sample page or a small wait-list to find the unresolved questions. Ask which colours they already wear, what they layer beneath a shirt and how they decide between two sizes. Ask whether they prefer a straight hem, a curved hem, button cuffs or pockets. Do not collect personal body measurements unless you have a clear reason and a suitable privacy process.
Track each response by the question it answers. “I like the red check” is a colour preference. “I returned my last shirt because the sleeve was short” points to a measurement and fit question. “I could not tell whether it was cotton” points to product information. These notes may shape the range, product page, size table and support process in different ways.
A small audience test can show which presentation earns useful interest. Share two accurate sample photos with different buyer descriptions, or ask existing followers which fit detail they need to see. Keep the test limited and record what people did, not only what they said. A click or saved post does not confirm a sale, and a short poll does not establish the size of the market.
A clothing range can expand quickly. Every fit, colour and size may become a separate stock-keeping unit (SKU), which is the distinct stock record you use to count and reorder an item. Two fits, three colours and six sizes create 36 possible variants before you add sleeve length, fabric weight or a second pattern. You then need enough stock in the right variants, accurate product photos and a way to prevent a sold-out size from accepting another order.
Start with one fit and a small number of colourways that share the same fabric and construction. Choose the sizes you can source and measure reliably. If supplier minimums force a larger run, price the stock risk before committing. A broad size chart does not help if you cannot verify how the sample changes across the range.
| Range choice | What to verify | Why it affects the first test |
|---|---|---|
| One fit | Finished garment measurements and the intended layer underneath | The fit promise stays consistent across the product page and photos. |
| Two colourways | Colour names, pattern scale, production match and available stock | You can compare preference without multiplying every range choice. |
| A measured size run | Chest, body length, shoulder and sleeve dimensions for each size | The buyer can compare a real garment rather than guess from a label. |
| One accessory | That it suits the same customer and has a separate cost and stock record | A useful bundle can raise complexity, packing time and return handling. |
Do not assume that a different colour is a different quality level or that a higher price makes a shirt more desirable. Give each option a reason to exist: a different checked pattern, a different weight verified from the supplier, or a different cut that suits a different layering choice. If the product page cannot explain the distinction, the range may be too broad for an early test.
A simple first range might be a relaxed fit in two checks, with a measured size run. A separate close-fit option could follow only after you have evidence that buyers want it and you can keep its size table, images and stock records clear. This is a test structure, not a recommendation about how many colours or sizes will sell.
Compare the role of flannel with nearby categories. Our fleece jacket article covers a different layering garment and its own fit checks. For a different shirt construction, see how to sell button-down shirts online. A flannel range needs its own fabric and wash evidence even when the same buyer might browse both.

You might buy finished shirts from a UK wholesaler, source from a maker overseas, commission a private-label run, sell second-hand pieces one at a time or use a fulfilment partner. Each route changes the cash needed, the minimum quantity, the control you have over fit and the documents available. Decide what evidence you need before comparing a low unit price with a higher one.
A wholesaler can provide access to finished stock and a size run without commissioning a full production batch. Ask whether the quoted quantity can be split across sizes and colours, how often the collection changes and what happens when a size sells out. Request the actual garment measurements, current fibre label, care instructions, carton or bag dimensions and the return process for a faulty batch.
Ask whether the photographs represent the current production run. A recycled catalogue image may show an earlier fit, different buttons or a fabric shade that is no longer supplied. Request a sample from the lot you expect to buy. Record the supplier name, product code, colour code, size and order date so you can match a complaint or quality change to the stock you hold.
A private-label arrangement gives you more input into fabric, pattern, label and packaging, but it brings more decisions before sale. Ask about minimum quantities per colour and size, sample charges, development time, fabric reservation, production tolerances, payment milestones, inspection rights and remedies if bulk stock differs from the approved sample. Request written answers and a versioned specification.
Check who supplies the fibre-composition information and who is responsible for labels on the finished garment. Ask what evidence supports any statement about cotton, wool, recycled content, organic production or origin. If you plan to sell in more than one market, ask for documents relevant to each destination rather than assuming a label prepared for one country fits every market.
For a small first test, consider whether a local maker can produce a sample or short run. A shorter route may make communication and inspection easier, but it does not prove the finished shirt is consistent or correctly labelled. Request the same evidence and sample checks from every route.
Vintage or second-hand flannel shirts create a different offer: garment condition, measurements and available quantity may vary piece by piece. Photograph the actual item, disclose repairs or marks, measure it individually and use a stock system that prevents a one-off shirt from being sold twice. Record the label and the condition you inspected rather than copying a generic description to every listing.
Describe washing or cleaning accurately. A cleaned garment is not automatically “like new”, and a strong fragrance does not prove cleanliness. Keep stock dry, store it away from odours and pests, and follow product-care recommendations. Check how consumer rights and product-safety duties apply to the way you trade in used goods.
If an answer changes what you can safely claim or what a buyer receives, get it in writing. A verbal promise about a “heavy cotton flannel” does not establish the fibre percentage, weight, care method or quality of a later batch. Keep the reply with the order and product code.
Order a saleable sample before committing to a full size run. Confirm the style, colour, size and product code against the proposed listing. Photograph the packaging and label as it arrives, then note any gap between the supplier’s claims and the actual garment. This is your own incoming check, not a laboratory assessment or certification.
Feel the fabric in more than one direction. A brushed surface may look different when the nap lies one way or another. Compare the front and reverse, check whether the surface catches on a rough edge, and look for loose fibres, thin patches or uneven colour across panels. Note what you observed in plain terms rather than assigning a quality grade you cannot support.
If the supplier gives a fabric weight, ask how it was measured and whether that figure refers to the fabric before or after finishing. The number alone does not say how warm a shirt will feel, how it drapes or how durable it is. You can weigh the sample for your records, but do not turn one garment weight into a claim about all units unless production records support it.
Inspect check alignment across the placket, pocket, shoulder seams and side seams. Pattern matching is a design choice, not a universal pass-or-fail rule. Decide what consistency you expect, photograph the approved sample and write that standard into a purchase specification if it matters to your offer.
Open and close each button. Check that buttonholes are cleanly finished, buttons are attached securely and the placket lies flat. Look at the collar points, cuff corners, pocket edges, underarm seams, shoulder seams and side splits. These are places where a loose thread or uneven finish can become a support question after delivery.
Gently handle the garment as a buyer would. Do not pull hard enough to damage the sample. Check whether seams twist, pockets sit at the same height and the collar holds its shape after fastening. Record faults with a close photograph and ask the supplier whether the same issue appears in the bulk run.
Use the same inspection for each received batch. A sample approved months ago does not prove that a changed fabric lot or factory run matches it. If the supplier changes the mill, dye lot, brushing process, button, thread or pattern placement, request an updated sample and paperwork before reusing the old listing images.
Photograph and measure the sample before washing. Follow the care label exactly, including the temperature, cycle and drying method. Do not invent a wash test that conflicts with the garment instructions. After the item has dried and rested, repeat the measurements at the same points and record the change.
A simple calculation can show the size of a change in one dimension: subtract the after-wash measurement from the before-wash measurement, divide by the before-wash measurement and multiply by 100. If a shirt’s body length changes from 72 cm to 70.5 cm, the change is 1.5 cm, or about 2.1% of the original length. This describes your sample and method, not every shirt in production.
Look for visible colour transfer, twisting, surface changes, seam puckering and button movement. A domestic wash check is only a screening observation. It does not establish formal colourfastness, fibre composition, durability across repeated washing or conformity with a recognised test standard. Ask the supplier for relevant test records when a claim or buying decision depends on them.
Keep the sample-test record with its order. Include the item code, size, colour, label instructions, date, machine setting, drying method, measurements and photographs. If a bulk shirt behaves differently, compare it with the approved sample and pause the listing until you understand the cause.

A label such as S, M or L is not a measurement. Sizing varies between makers and cuts, so show the finished shirt dimensions and say whether you measured it laid flat or around the body. Keep units consistent. Explain whether the buyer should compare the table with a shirt they own or with their own body measurements.
| Measurement | How to measure the garment | What the buyer can compare |
|---|---|---|
| Chest width | Lay the shirt flat, fasten it and measure straight across from one underarm point to the other. | A similar shirt they own, measured the same way. |
| Body length | Measure from the centre back below the collar seam to the hem. | The coverage they want when the shirt is worn tucked or untucked. |
| Shoulder width | Measure from one shoulder seam to the other across the back. | Whether the shoulder seam sits close to their shoulder or drops for a relaxed fit. |
| Sleeve length | Measure from the shoulder seam to the cuff edge along the sleeve. | The sleeve reach, using the same start point on another garment. |
| Cuff opening | Fasten the cuff and measure across the opening, then state whether the value is flat or circumference. | The wrist opening and whether the cuff fits over a layer. |
Take each measurement with the same method and tool. Record it twice and resolve a mismatch before publishing. Measure the sample in its natural state without stretching it. For a fitted shirt, a flat chest width can be doubled to approximate the garment circumference, but do not call that the wearer’s body measurement or imply that it is a perfect fit prediction.
Explain ease in plain language. Ease is the extra room between a garment and the body, and buyers may prefer more or less of it. Rather than stating that a shirt “runs true to size”, explain that it is intended to be close or relaxed, then point to the garment measurements. If the shirt is designed to be layered, say what the sample was worn over during your photo or fit check.
Measure more than one size if your supplier can provide a complete sample set. A grading chart is useful, but it does not confirm that the delivered garment matches it. Compare the size steps across chest, shoulder, body length and sleeve. If a size jumps sharply or the sleeve barely changes, ask the supplier whether the measurements are correct.
Use a fit model only when you can give truthful context and have consent to use the photographs. Record the model’s height and the size worn if those details are available and relevant. Do not infer that every person with the same height should choose the same size. Body shape, layering preference and garment ease matter too.
Track size questions, exchanges and returns by variant. A repeated complaint about sleeve length may call for clearer measurements, a revised fit or a new supplier sample. A return for colour can suggest a photography or monitor expectation issue. Keep separate reasons instead of reporting every return as a single percentage.
Do not set the price from the shirt cost alone. Include the cost of getting the garment to you, checking it, packaging it, accepting payment, shipping it, replacing or refunding a return, finding a buyer and answering questions. Record whether a cost includes VAT and whether a marketplace charges a percentage, a fixed amount or both.
The figures below are invented planning assumptions, not supplier quotes, current market prices or a profit forecast. This example assumes a non-VAT-registered seller charges £54 for one shirt and offers standard delivery. Replace each figure with your actual quote and records.
| Variable cost per completed order | Illustrative amount |
|---|---|
| Shirt purchase cost | £17.00 |
| Inbound freight allocation | £1.60 |
| Receiving and inspection time | £1.50 |
| Mailing bag, tissue and order label | £2.10 |
| Payment or marketplace fee allowance | £3.24 |
| Outbound delivery | £4.60 |
| Returns and exchange allowance | £3.00 |
| Customer acquisition allocation | £5.00 |
| Pick, pack and customer support time | £1.60 |
| Total listed variable costs | £39.64 |
On these assumptions, £54.00 minus £39.64 leaves £14.36 contribution before fixed overhead, owner pay and tax. That is not net profit. The fee line is an example only; replace it with the payment provider’s or marketplace’s current calculation, including any charge on postage or tax where applicable.
If you offer a £5 discount and every cost stays the same, the contribution falls to £9.36. A promotion can help you learn whether a different offer attracts buyers, but write down the contribution before and during the promotion. Do not treat revenue or a busy week as proof that the price covers the work.
Fixed costs sit outside the order table. Add your website, insurance, accounting, storage, photography, software and other recurring expenses. If monthly fixed costs were £430 in this made-up example and the contribution remained £14.36, the simple arithmetic break-even would be about 30 completed orders (£430 divided by £14.36, rounded up). That calculation excludes owner pay and tax, so it is only a planning reference.
Clothing cash can sit in sizes that sell at different speeds. Estimate the cash required for each colour and size before you pay a deposit. A supplier may require a minimum number per colour or size. If the order has 24 shirts, write down how many units you expect to carry in each variant and how you will respond if one size is requested more often.
Test a slower-sales case and a higher-returns case. Add the cost of a return label if you offer one, time to inspect the garment, packaging that cannot be reused, a refund of standard delivery where required and any item that cannot be resold at the original price. Use your own data as it builds. A reserve is a budget estimate, not evidence of a return rate.
Set a maximum test budget that includes samples, product photos, first stock, delivery materials and a small marketing test. Keep funds available for a return or faulty batch. If the supplier’s minimum order uses nearly all your budget, ask about a smaller mixed run or choose a different route. Do not accept customer payments for a size you cannot deliver within the terms you have promised.
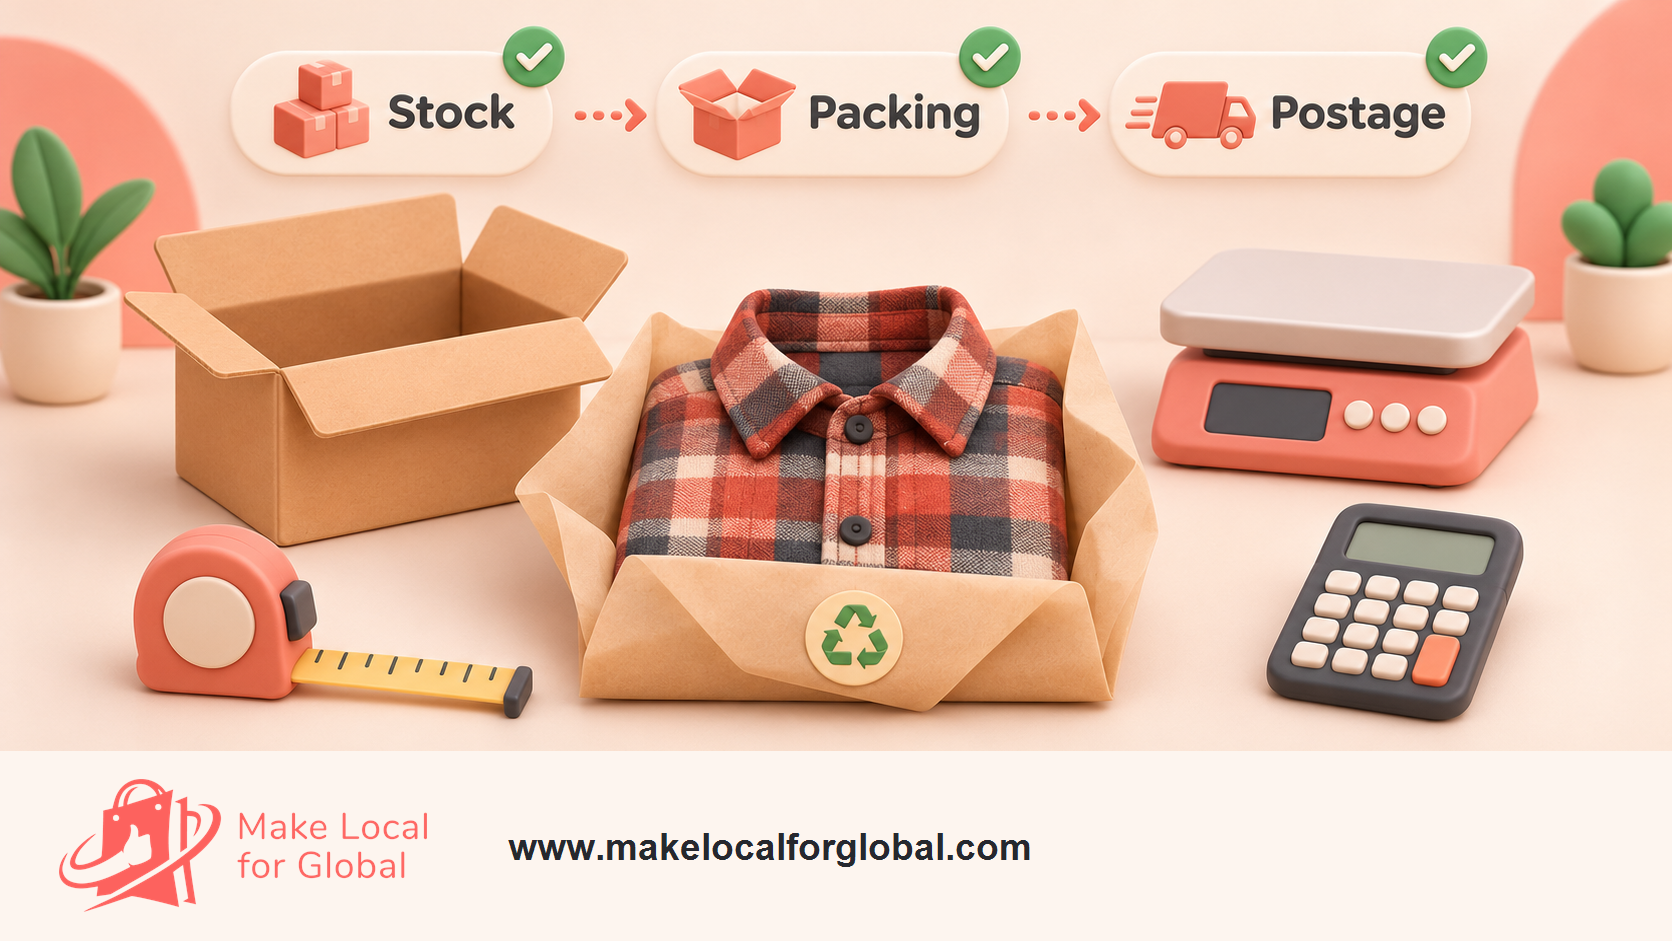
Check whether the shop can present sizes clearly, handle variants and support your order process.
A title should name the garment and a verified distinction. For example, “Relaxed checked flannel shirt with two chest pockets” is useful only when the sample and supplied item match those details. Avoid empty superlatives. State whether the shirt is designed to be close-fitting or roomy, and show the measurements before the buyer has to search for them.
Use a short opening paragraph to name the intended wearer or layering use, the exact fabric composition and the fit. Follow it with a measurement table and a list of included features. State care instructions from the garment label. Include the country of origin only when the supplier’s records support it.
Use the actual stock or approved sample for the main listing photographs. Illustration graphics can explain measurement or checking steps, but they should not stand in for a product photograph that promises a certain shade, pocket position or fabric texture. Photograph each colourway when the colours look meaningfully different. Avoid a filter that changes the plaid colour.
Write helpful alt text that describes what the image shows, such as “Red and navy checked shirt laid flat with chest and sleeve measurements marked.” Do not repeat the focus phrase in every image alt field. Place each image beside the paragraph that explains it, use a clear filename and check that the image still loads on a narrow screen.
Make the key details easy to scan: fibre composition, fit, garment measurements, care label, closure, pockets, available colours, delivery estimate and returns process. If the bulk garment may vary from the sample, describe how you check each batch. If the supplier has not confirmed a claim, leave it out until the records arrive.
Use the words buyers use in questions, not a repeated list of near-identical keywords. Helpful related topics include a flannel shirt size guide, how to measure a shirt laid flat, what the fibre label says and whether the garment can be worn as an overshirt. A page can mention “checked shirt” or “brushed cotton” only where the actual product fits those descriptions.
Search visibility depends on much more than a phrase in a title. Write the page so a person can decide whether the exact shirt matches their needs. Google recommends useful people-first content, clear page titles and crawlable links, and gives no guarantee that a page will be indexed or shown for a query. See the Google Search Essentials for current baseline guidance.
Build relevant internal links where they help the visitor continue. A reader who is comparing fabric can move to our fabric-by-the-metre article. A seller comparing casual tops may find the custom T-shirt article useful. Avoid linking to unrelated products just to add more links.
Rules depend on where you sell, how you source and what claims you make. This section is a signpost for UK sellers, not legal advice. Read the current official guidance for each destination market and speak with Trading Standards, an appropriate adviser or a lawyer when your role is unclear.
For England, Scotland and Wales, GOV.UK says textile labels must show fibre content, including fur and other animal parts. Where a product has components with different fibre contents, the content of each must be shown. Manufacturers and retailers share responsibility for complying, and retailers placing EU products on the UK market should check the presence and accuracy of labels. Read the current GOV.UK textile labelling guidance.
Do not infer the fibre percentage from a product name, supplier headline or fabric feel. Request a copy of the label and any composition evidence for the exact style. Compare that information with the label on the sample and with the online description. If a contrast lining, trim or other component has a different fibre content, ask how the supplier applies the rules to that garment.
The GOV.UK textile labelling page applies to England, Scotland and Wales. Northern Ireland operates under a different product-regulation route. Check the current Northern Ireland guidance before listing there; do not assume a label accepted for one part of the UK automatically answers every requirement elsewhere.
Ordinary shirts may appear simple, but the seller still needs a reliable supply record and a process for product concerns. The Office for Product Safety and Standards says UK sellers must not sell products they know or should know are unsafe, must keep records that identify suppliers and must report relevant safety risks or incidents to the manufacturer, supplier or local Trading Standards service. Read the current product-safety advice for businesses.
Keep the purchase order, supplier identity, product code, label version, batch or lot details, sample photographs, correspondence and complaint records together. If a concern arises, pause the affected listing, isolate stock and ask the supplier what other units may be affected. Do not answer a safety question with a marketing rewrite or tell a buyer to keep wearing a garment that has caused harm.
Extra rules may apply if the shirt is made for a specific use, sold as protective clothing or intended for children. Do not add those markets to a first range until you understand the relevant standards and evidence. A casual flannel shirt should not be advertised as protective workwear by implication or by using safety imagery without support.
Claims about organic fibre, recycled content, lower impact, ethical production or sustainability need evidence that matches the exact product and wording. Ask what part of the garment the claim covers, which certification or record supports it and whether it applies to the current production batch. Keep the supporting documents and make important qualifications easy for a buyer to find.
The CMA’s fashion retail guidance explains that businesses are responsible for environmental claims they make about products from their supply chain. Review the CMA guidance on green claims in fashion retail before using broad language or comparison claims. If a supplier says a shirt is recycled or organic, check the records instead of repeating the statement without review.
Online customers need clear product, price, delivery and cancellation information before placing an order. In most distance sales of goods, a customer can tell the seller within 14 days after delivery that they want to cancel, then has another 14 days to send the goods back. A customer may handle a shirt as they would in a shop to assess it. Rules and exceptions apply, so read the current GOV.UK returns and refunds guidance before writing your policy.
Do not label a standard size or colour variant “custom made” simply because it is produced after an order. If you offer genuinely personalised or made-to-measure garments, check the exception and explain the terms accurately. Faulty, misdescribed or damaged goods bring separate rights. A shop policy cannot remove statutory rights.
State the delivery cost, dispatch window, returns address or process, contact channel and expected refund steps. Tell customers what to do if the parcel arrives damaged or the wrong size is sent. A clear process protects the customer experience and gives you a consistent way to record issues.
Pack the shirt clean and fully dry. Fold it consistently so the collar, buttons and cuffs are not crushed. Choose a protective bag or carton that fits the folded garment without excessive void space. Keep any care or product information with the order, and check whether the packaging remains intact through the carrier route you plan to use.
Pack one complete order and measure the sealed parcel. Record its length, width, height and weight, then use those values to request current carrier prices. A shirt folded in a thin bag may fit one parcel band, while a box or gift presentation may push it into another. Recheck the price if you add tissue, a second garment or a gift box.
Store stock in a clean, dry place away from direct sun, damp and strong odours. Keep each size and colour in a labelled location. Record incoming quantity, sales, returns, faults and stock adjustments against the exact product code. A simple spreadsheet can help, but the count needs to match what is physically available.
Make the sold-out response deliberate. Hide the size, allow a wait-list or show a truthful replenishment estimate. Do not accept a backorder without a reliable supplier lead time and clear customer agreement. If a restock comes from a changed fabric lot, inspect it against the original sample before reopening the listing.
When a return arrives, inspect it consistently and record the reason, condition, size, colour and next action. Separate a change-of-mind return from a garment fault, wrong size sent, misdescribed fit or transit issue. Decide whether the item can be returned to saleable stock and update the customer under the correct process. Do not use one vague “customer return” category for every outcome.
A marketplace may already have shoppers looking for shirts, but fees, listing rules, delivery expectations and return processes affect the margin. Your own shop gives more control over size tables, fabric detail, related products and support. A local event or fitting appointment can let people handle a sample, but it adds staffing, travel and display costs.
Compare channels with a completed order cost. Record subscription or listing fees, transaction charges, shipping, packaging, advertising, returns and the time you spend answering size questions. Check whether each platform lets you show garment dimensions, care details, fabric close-ups and available stock by size. Read its current category rules before paying for a plan or listing service.
Build a small content test around questions you can answer from your sample. A short fit video can show the shirt worn open and fastened. A photo carousel can explain chest, sleeve and back-length measurements. A fabric close-up can show the checked pattern and brushed surface. A post about washing can point to the label and your sample method without promising a result for every future batch.
Invite interested buyers to join an email list only with clear consent. Ask what they still need to know before choosing a size. Track visits, size-table use, questions, add-to-basket actions, completed orders, returns and contribution by variant. Review the result before you pay for a wider range.
Use search terms that describe the offer, such as “checked flannel shirt”, “brushed shirt”, “relaxed-fit flannel shirt” or “flannel overshirt”, only when each phrase accurately matches the garment. Keep the product page readable. Do not create nearly identical pages for every colour when the page content and buyer decision are the same.
If you compare your offer with other apparel, keep the buyer task distinct. The fleece jacket guide focuses on a different garment, and our fabric sales guide covers a seller who supplies material rather than finished shirts. Useful links help readers choose the next relevant question; repeated anchors do not add value.
By the end of the first week, choose one sample to test or record why none is ready. Keep the buyer notes and supplier answers together. A slower decision can cost less than buying a batch with no reliable size information.
Ask the supplier about every result that affects the description or the size table. If the sample changes more than you expected, request a second sample or ask for relevant test evidence. Do not rely on a photograph to resolve a material or fit issue.
Fix any unanswered question before promoting the listing. If the first reader cannot tell whether the shirt is a close fit or a relaxed layer, the page needs a clearer description or better measurement evidence.
Set a simple decision rule before the test starts. For example, reorder only if the supplier can repeat the approved sample, the actual contribution remains above your chosen minimum and the size questions can be handled with the information you have. Record why you continue or pause. A test that prevents a poor batch purchase has still produced a useful decision.
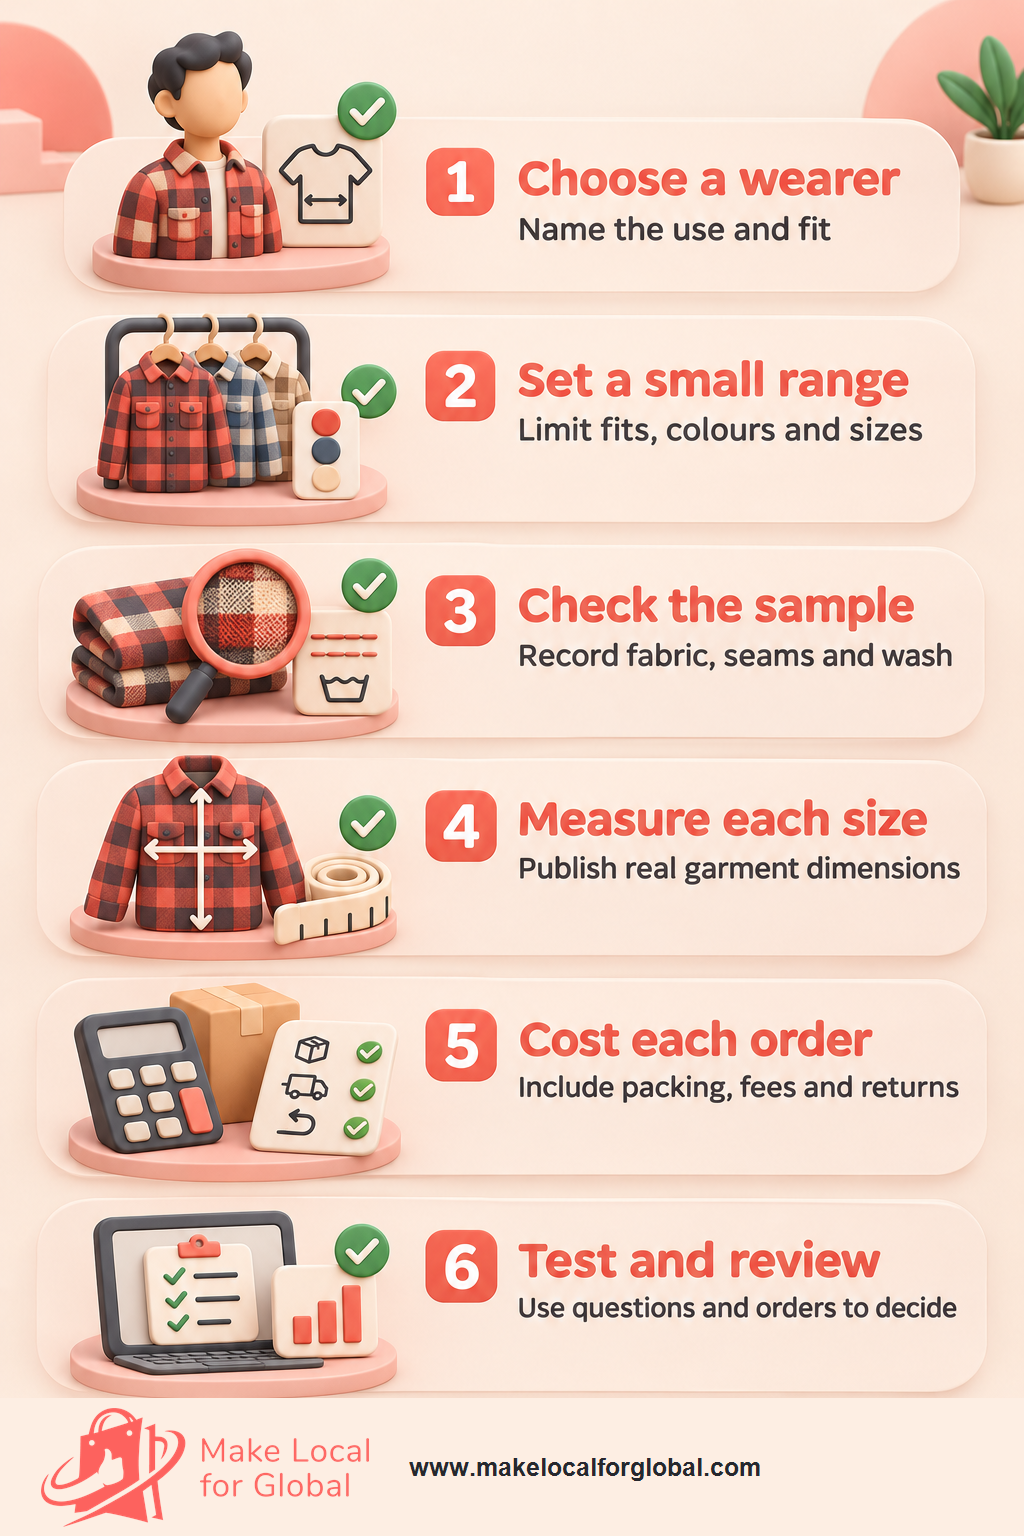
It can suit a seller who can explain the fit, verify the fibre label, inspect samples and handle size exchanges. The product is not ready simply because a supplier has an attractive photo. Check the order minimum, sample, size run, parcel cost and support route before you invest in stock.
Ask for the exact product code, fibre composition, label wording, finished measurements for each size, care instructions, sample, minimum order, lead time and a written process for defects or changed production. Keep the responses with the purchase record and verify that bulk stock matches the sample.
Do not assume the fibre from the word “flannel”. Check the sewn-in label and supplier records for the exact shirt, then use that composition in the product page. If the garment has components with different fibre contents, get advice on how the label should present them in the market where you sell.
Publish actual measurements for each size, explain the intended fit and show how you measured the garment. Use consistent fit photographs and answer layering questions. Track the reason for each exchange or return so you can tell a sizing issue from a colour, condition or delivery issue.
Use that term only when the cut and measurements support layering over another garment. Test the sample over the kind of layer shown in the product photo, then describe the chest, shoulder and sleeve room. A name alone does not tell a buyer how much space the garment has.
Measure the sample before washing, follow the care label, let it dry as directed and measure the same points again. Record the garment, method and result. A single sample check is useful for spotting a question, but it does not prove how every production unit will behave or replace a recognised test when formal evidence is needed.
For England, Scotland and Wales, the GOV.UK textile labelling guidance says the label must show fibre content, including animal parts, and different fibre contents may need to be shown for different components. Retailers and manufacturers are responsible for compliance. Check the guidance and requirements for the destination market before listing the product.
Only when you have clear evidence for the claim on the exact product and can explain its scope. Ask for batch-linked supplier records, certification details where relevant and the conditions that apply. The CMA’s fashion guidance explains that retailers remain responsible for claims they make about products in their supply chain.
Customers can usually handle an online purchase as they would in a shop, including trying clothing on to see how it looks. Distance-selling cancellation periods and exceptions apply, and faulty-goods rights are separate. Read current GOV.UK guidance and write a returns process that reflects your offer and destination market.
Add the shirt, inbound delivery, inspection time, packaging, fees, postage, customer acquisition and a returns allowance. Compare the contribution with fixed costs, cash tied up in sizes and the time spent supporting customers. Use supplier and carrier quotes rather than treating an example price or competitor listing as proof of a workable margin.
Compare the channel fees, product-page options, stock controls, delivery process, customer support and return handling. A marketplace may give access to shoppers but can add fees and rules. Your own site gives you more control over fit information and related content but requires a way to bring visitors to the listing. Test the route whose costs and service duties you can manage.
Bring together the buyer statement, supplier file, sample measurements, wash notes, label details, product photographs, parcel dimensions and cost sheet. The first offer is ready for a small test when you can explain who the shirt is for, what arrives, how it fits, what the label says and what each completed order costs under your assumptions.
If one of those answers is still missing, pause the larger purchase and collect the evidence. A focused shirt range gives you a better way to answer fit questions and decide whether buyers want another colour, a different cut or a separate product.
Use the sample and order costs to decide whether to test, revise or expand the range.
PREFERRED SOURCE
Like what you’re reading? Add Make Local for Global as a preferred source on Google to see more of our articles when you search.

Build your online presence without having to figure out everything yourself.